User Roles
Every person in your monday.com account is assigned one of three roles inside WorkHub. The role determines what they can see and do across all plugin features.
Admin
Admins are monday.com account owners and users with admin rights in monday.com. They have full access to every plugin feature, every user's data, and all settings. Admins can also promote other users to App Admin.
App Admin
App Admins are users explicitly granted elevated access by an Admin. They can do everything an Admin can except promote other users to App Admin. This role is useful for team leads or project managers who need to manage settings without having full monday.com admin rights.
Member
Members are regular monday.com users who have access to the plugin. They can log time, submit timesheets, request leave, and view their own workload and reports. Members cannot access settings.
What members can see beyond their own data
- Resource Scheduler — members can view and interact with the scheduler based on the monday.com boards they have access to. If a member has access to a board, they can see all scheduled items and worklogs on that board, including those assigned to other users.
- Timesheet Approver — if a member is assigned as a timesheet approver (via Settings → Timesheet Access), they can view and approve/reject timesheets for the users they are responsible for. The Pending Approvals and Approval History sections appear in their Timesheets sidebar. Approvers are also granted permission to log time on behalf of their approvees directly from the scheduler.
- Timesheet Viewer — if a member is added to the Viewers list, they can view (but not approve) every timesheet in the account, regardless of approver/approvee mapping. This is a global view role, intended for operations or finance users who need an account-wide read.
Members who are not assigned as approvers or viewers can only see their own timesheet data in the Timesheets module.
The two roles are additive. A user who is already an approver for specific users can also be added to the Viewers list to gain global view access on top of their approver rights. The Settings page shows approvers with a small "also an approver" hint in the viewer dropdown so admins know the user already has scoped access.
Both roles have full access to plugin features and settings. The only difference is that Admins can promote users to App Admin, while App Admins cannot. This prevents privilege escalation within the plugin.
| Role | Who qualifies | What they can do |
|---|---|---|
| Admin | monday.com account owner and admin users | Full access to all features, settings, and all users' data. Can designate App Admins. |
| App Admin | Users promoted by an Admin | Full access to all features and settings. Cannot promote other users. |
| Member | Regular monday.com users with plugin access | Log time, submit timesheets, request leave, view own data. View scheduler boards they have access to. Approve/view other users' timesheets if assigned as approver or viewer. |
Timesheet Approval Permissions
Timesheet approval permissions control who can approve, reject, and reopen timesheets, and who can view other people's timesheet data. These are configured in Settings › Timesheet Access.
Approver Rules
Each approver rule connects a target (whose timesheets) to a grantee (who gets the permission). Rules have three parts:
- Target type — All users, a specific team, or a specific user.
- Permission — Approve (includes approve, reject, reopen) or View (read-only).
- Grantee — A specific user who receives the permission.
- All users → Approve → Alice — Alice can approve timesheets for everyone.
- Team: Engineering → Approve → Bob — Bob can approve timesheets for all Engineering members.
- User: Charlie → Approve → Diana — Diana can approve only Charlie's timesheets.
Priority Chain
When a user submits a timesheet, the system picks the approver automatically using a priority chain:
- Per-user assignment — a rule targeting this exact user takes highest priority.
- Per-team rule — a rule targeting one of the user's monday.com teams.
- All-users rule — a catch-all rule for the entire workspace.
- Implicit admin access — Admins and App Admins can always approve any timesheet, even without explicit rules.
The most specific match wins. If multiple rules match at the same level, the earliest-created rule takes precedence.
Per-User Assignments
In the Approvers sub-tab, you can directly assign specific approvers to specific users. Multi-select is supported: pick several users and several approvers to create all combinations at once. Per-user assignments always override team and all-users rules.
View Access
By default, users can only see their own timesheets. Additional view access comes from:
- Admin access — Admins and App Admins can view all timesheets across the workspace.
- Approver access — users with approval permission automatically see the timesheets of their assigned approvees. This is scoped access: they only see users they are responsible for.
- Explicit viewer — add users in the Viewers sub-tab to grant global read access to every timesheet in the account, without approval rights.
Adding an existing approver to the Viewers list is allowed and additive: they keep approver rights for their assigned users, and gain global view access on top. Use this when an approver should also see timesheets outside their approvee scope (e.g. a team lead who approves their direct reports but also needs visibility across the department).
Leave Approval Permissions
Leave approval uses a simpler model than timesheets. Each user has one designated leave approver, assigned by an Admin in Settings › Leave Settings › Leave Approvers.
How It Works
When a user creates a leave request, the approver field is automatically filled in and locked. The user cannot change it. This ensures every leave request follows the configured reporting structure.
- Per-user assignment — each user has exactly one leave approver.
- Bulk assignment — select multiple users, choose one approver, and apply to all at once.
Leave Actions by Role
| Action | Assigned Approver | Submitter |
|---|---|---|
| Approve a pending request | ||
| Reject a pending request | ||
| Recall own request (before approval) | — | |
| Revoke approved leave |
Timesheets vs Leave: Key Differences
| Aspect | Timesheets | Leave |
|---|---|---|
| Assignment model | Rule-based with priority chain | Direct per-user assignment |
| Team-based rules | Supported | Not supported |
| Admin override | Admins can approve any timesheet | Must be assigned approver |
Access Control for Settings
Only Admins and App Admins can open the Settings panel. Members and restricted users cannot see or change any configuration. The Settings panel is where you manage:
- Board configurations and field mapping
- Permissions (Manage Access, Restrict Users, App Admins)
- Timesheet access rules (Approvers and Viewers)
- Leave settings and leave approver assignments
- Work capacity schemes and holiday schemes
The Permissions Tab
Inside Settings, the Permissions tab has three sub-tabs:
| Sub-tab | Purpose |
|---|---|
| Manage Access | Toggle "All Users" mode or add individual users to the allowlist. When "All Users" is on, everyone in your monday.com account can use the plugin. |
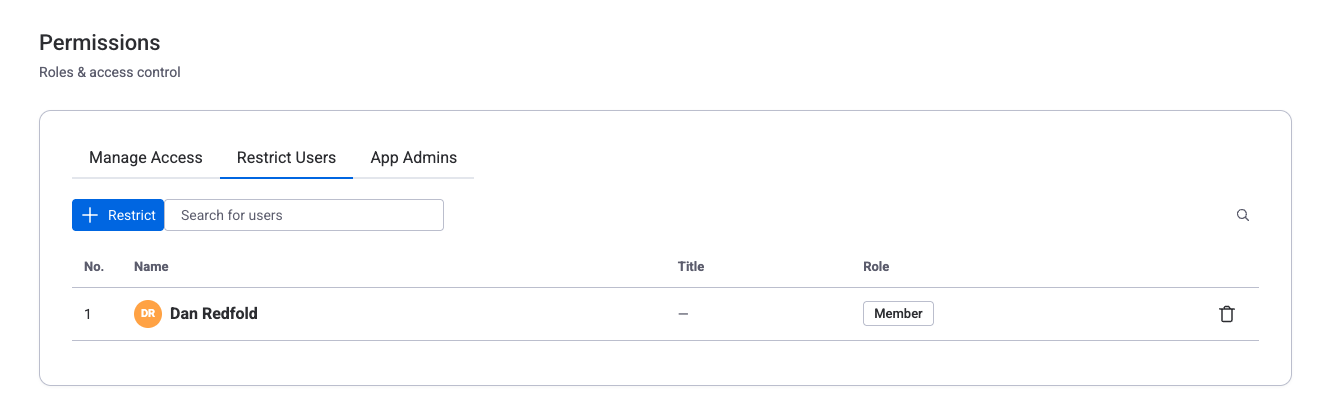
| Restrict Users | Block specific users from all plugin features. Restricted users see an access-denied message. |
| App Admins | Promote users to App Admin or revoke that status. Only monday.com Admins can do this. |
Restricted User Views
Users on the restricted list are completely blocked from the plugin. They cannot:
- Log time or view worklogs
- Submit or view timesheets
- Request or view leave
- Access the scheduler, workload, or reports
The restricted list always takes priority. Even when "All Users" mode is on, restricted users are blocked. To restore access, an Admin removes the user from the restricted list in Settings › Permissions › Restrict Users.
Guest Users
monday.com guest users (external collaborators) are automatically restricted from time tracking, timesheets, and leave features. No manual configuration is needed. Guests can view the Resource Scheduler on boards they have access to, but only in read-only mode.
Guest users typically represent external clients or contractors who should see project progress but not internal data like worklogs, timesheets, and leave balances.
My Settings (View Your Permissions)
Every user can see their own permission assignments by opening My Settings from the app sidebar. This read-only panel shows your leave approver, timesheet approver, and assigned work capacity scheme. If any field shows "Not assigned," contact your Admin.
Related Pages
- Settings — Full reference for all settings tabs, including Permissions and Timesheet Access
- Timesheets — Timesheet submission, approval workflow, and status lifecycle
- Leave Management — Leave requests, approval, recall, and allocation