Overview Back to top
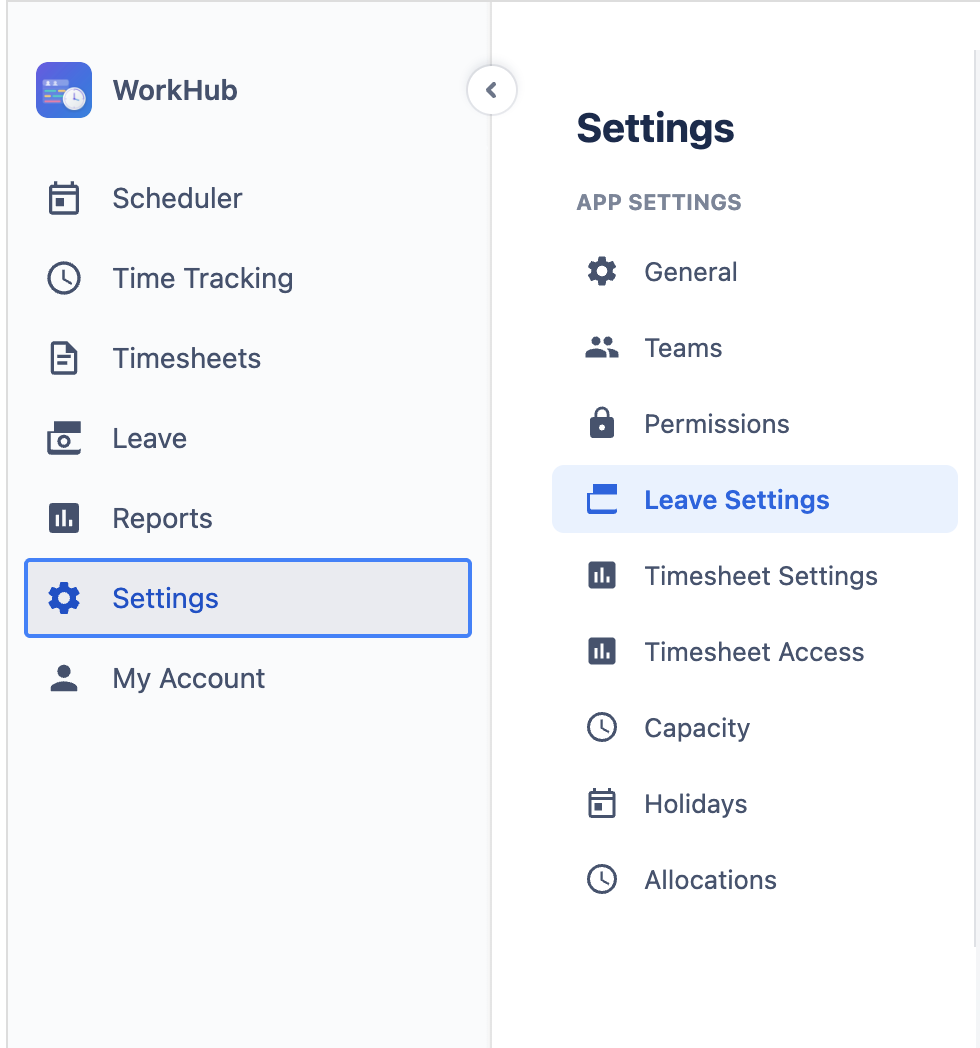
The Settings view is accessible to Jira site administrators and App Admins. It provides a centralized configuration panel organized into six tabs:
- General — app-wide defaults (work hours, work days).
- Teams — create/edit/update teams.
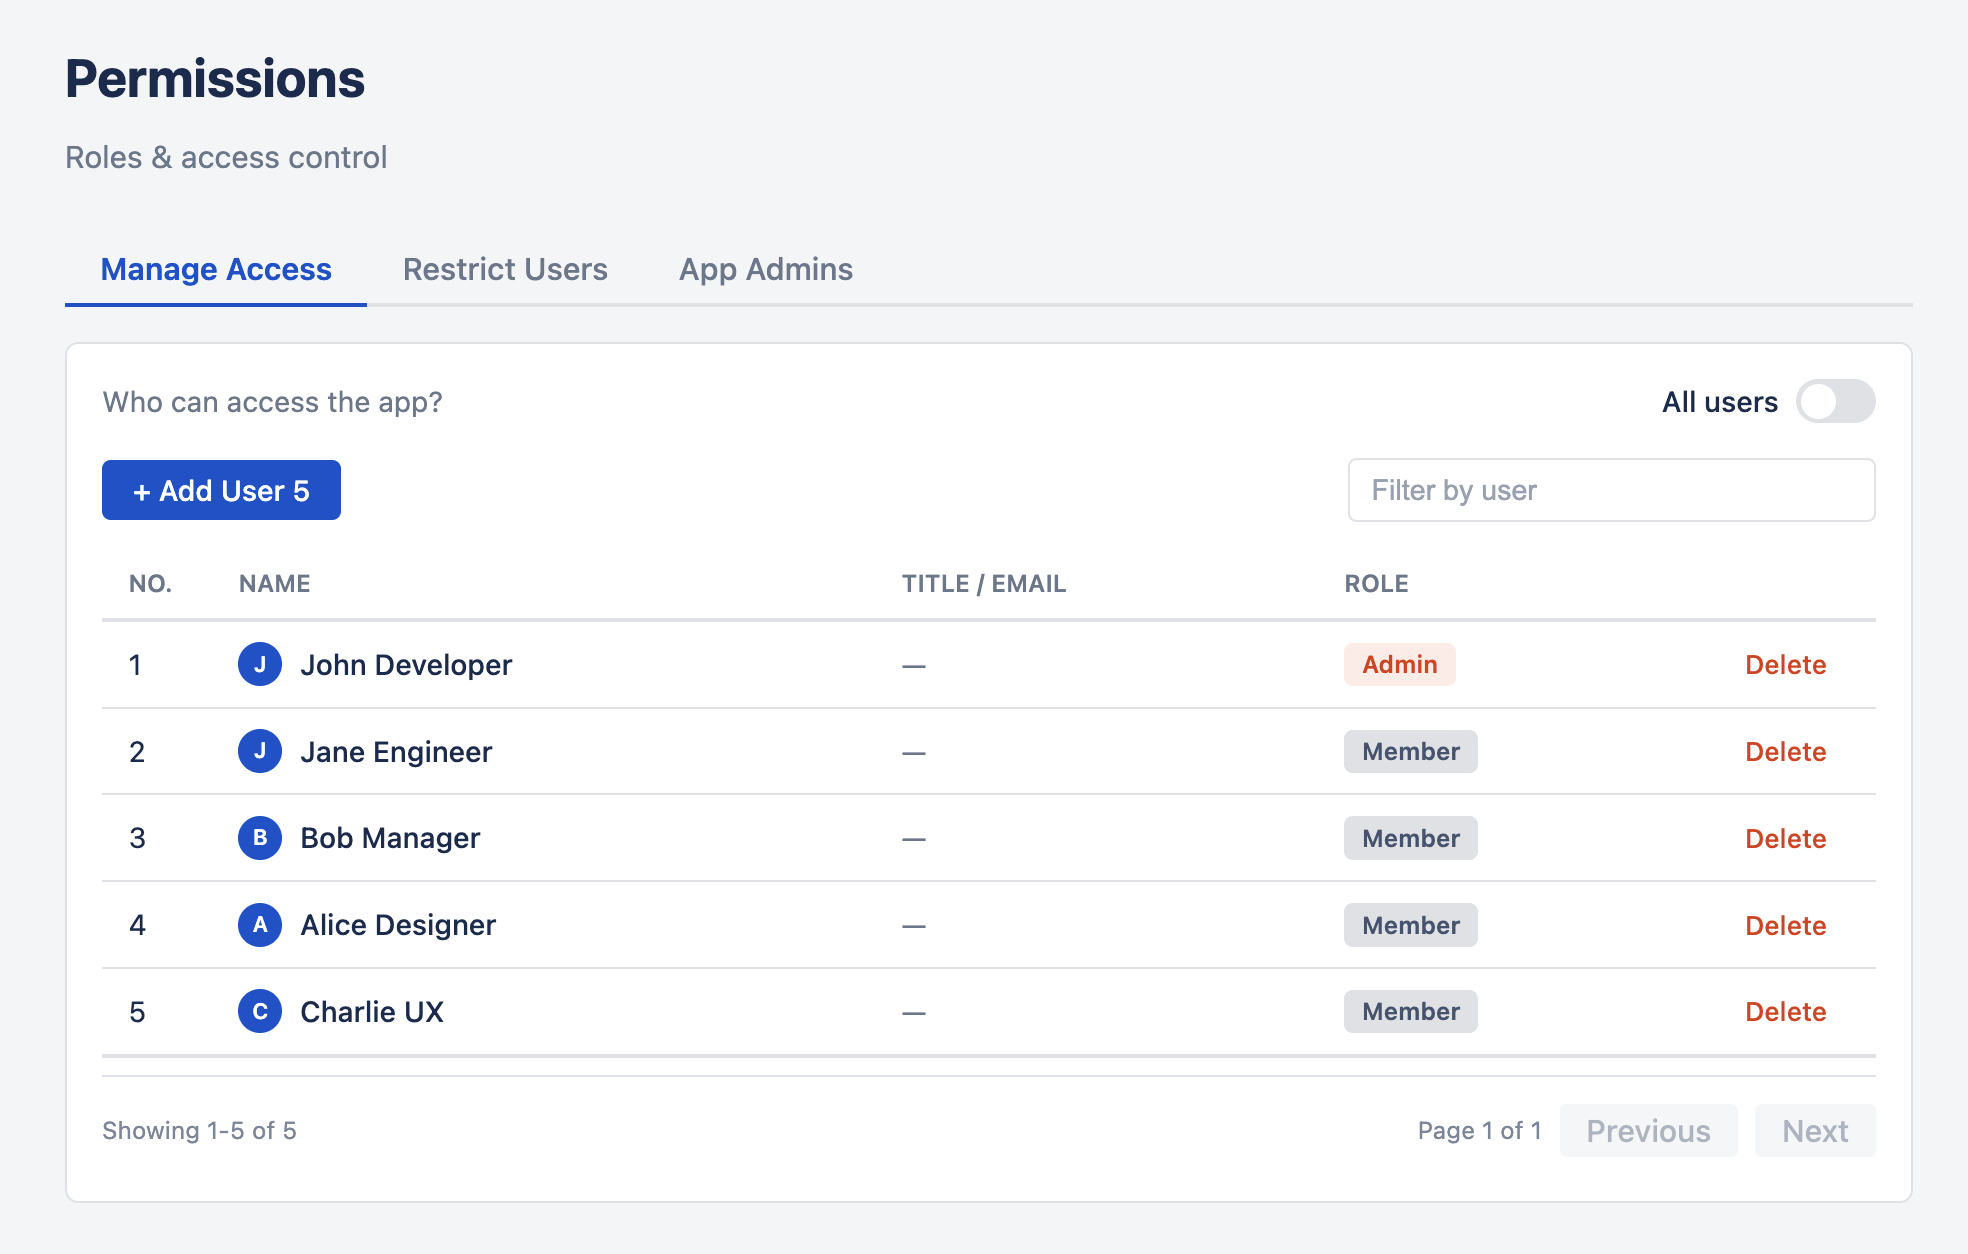
- Permissions — user access control (manage access, create team managers, app admins).
- Leave Settings — leave type configuration and leave approver assignments.
- Timesheet Settings — timesheet approval configuration.
- Capacity — capacity scheme management (define work schedules per user or team).
- Per Project Configuration — override global defaults (such as the story point conversion rate) for individual projects.
- Holidays — holiday calendar management (create calendars, assign to teams or users).
- Allocations — create and manage allocations categories.
- Issue Display — custom color rules for Scheduler issue bars (priority, status, fix versions, custom fields, due dates). See Issue Colors for full documentation.
General Back to top
The General tab contains app-wide settings that affect all users and features.
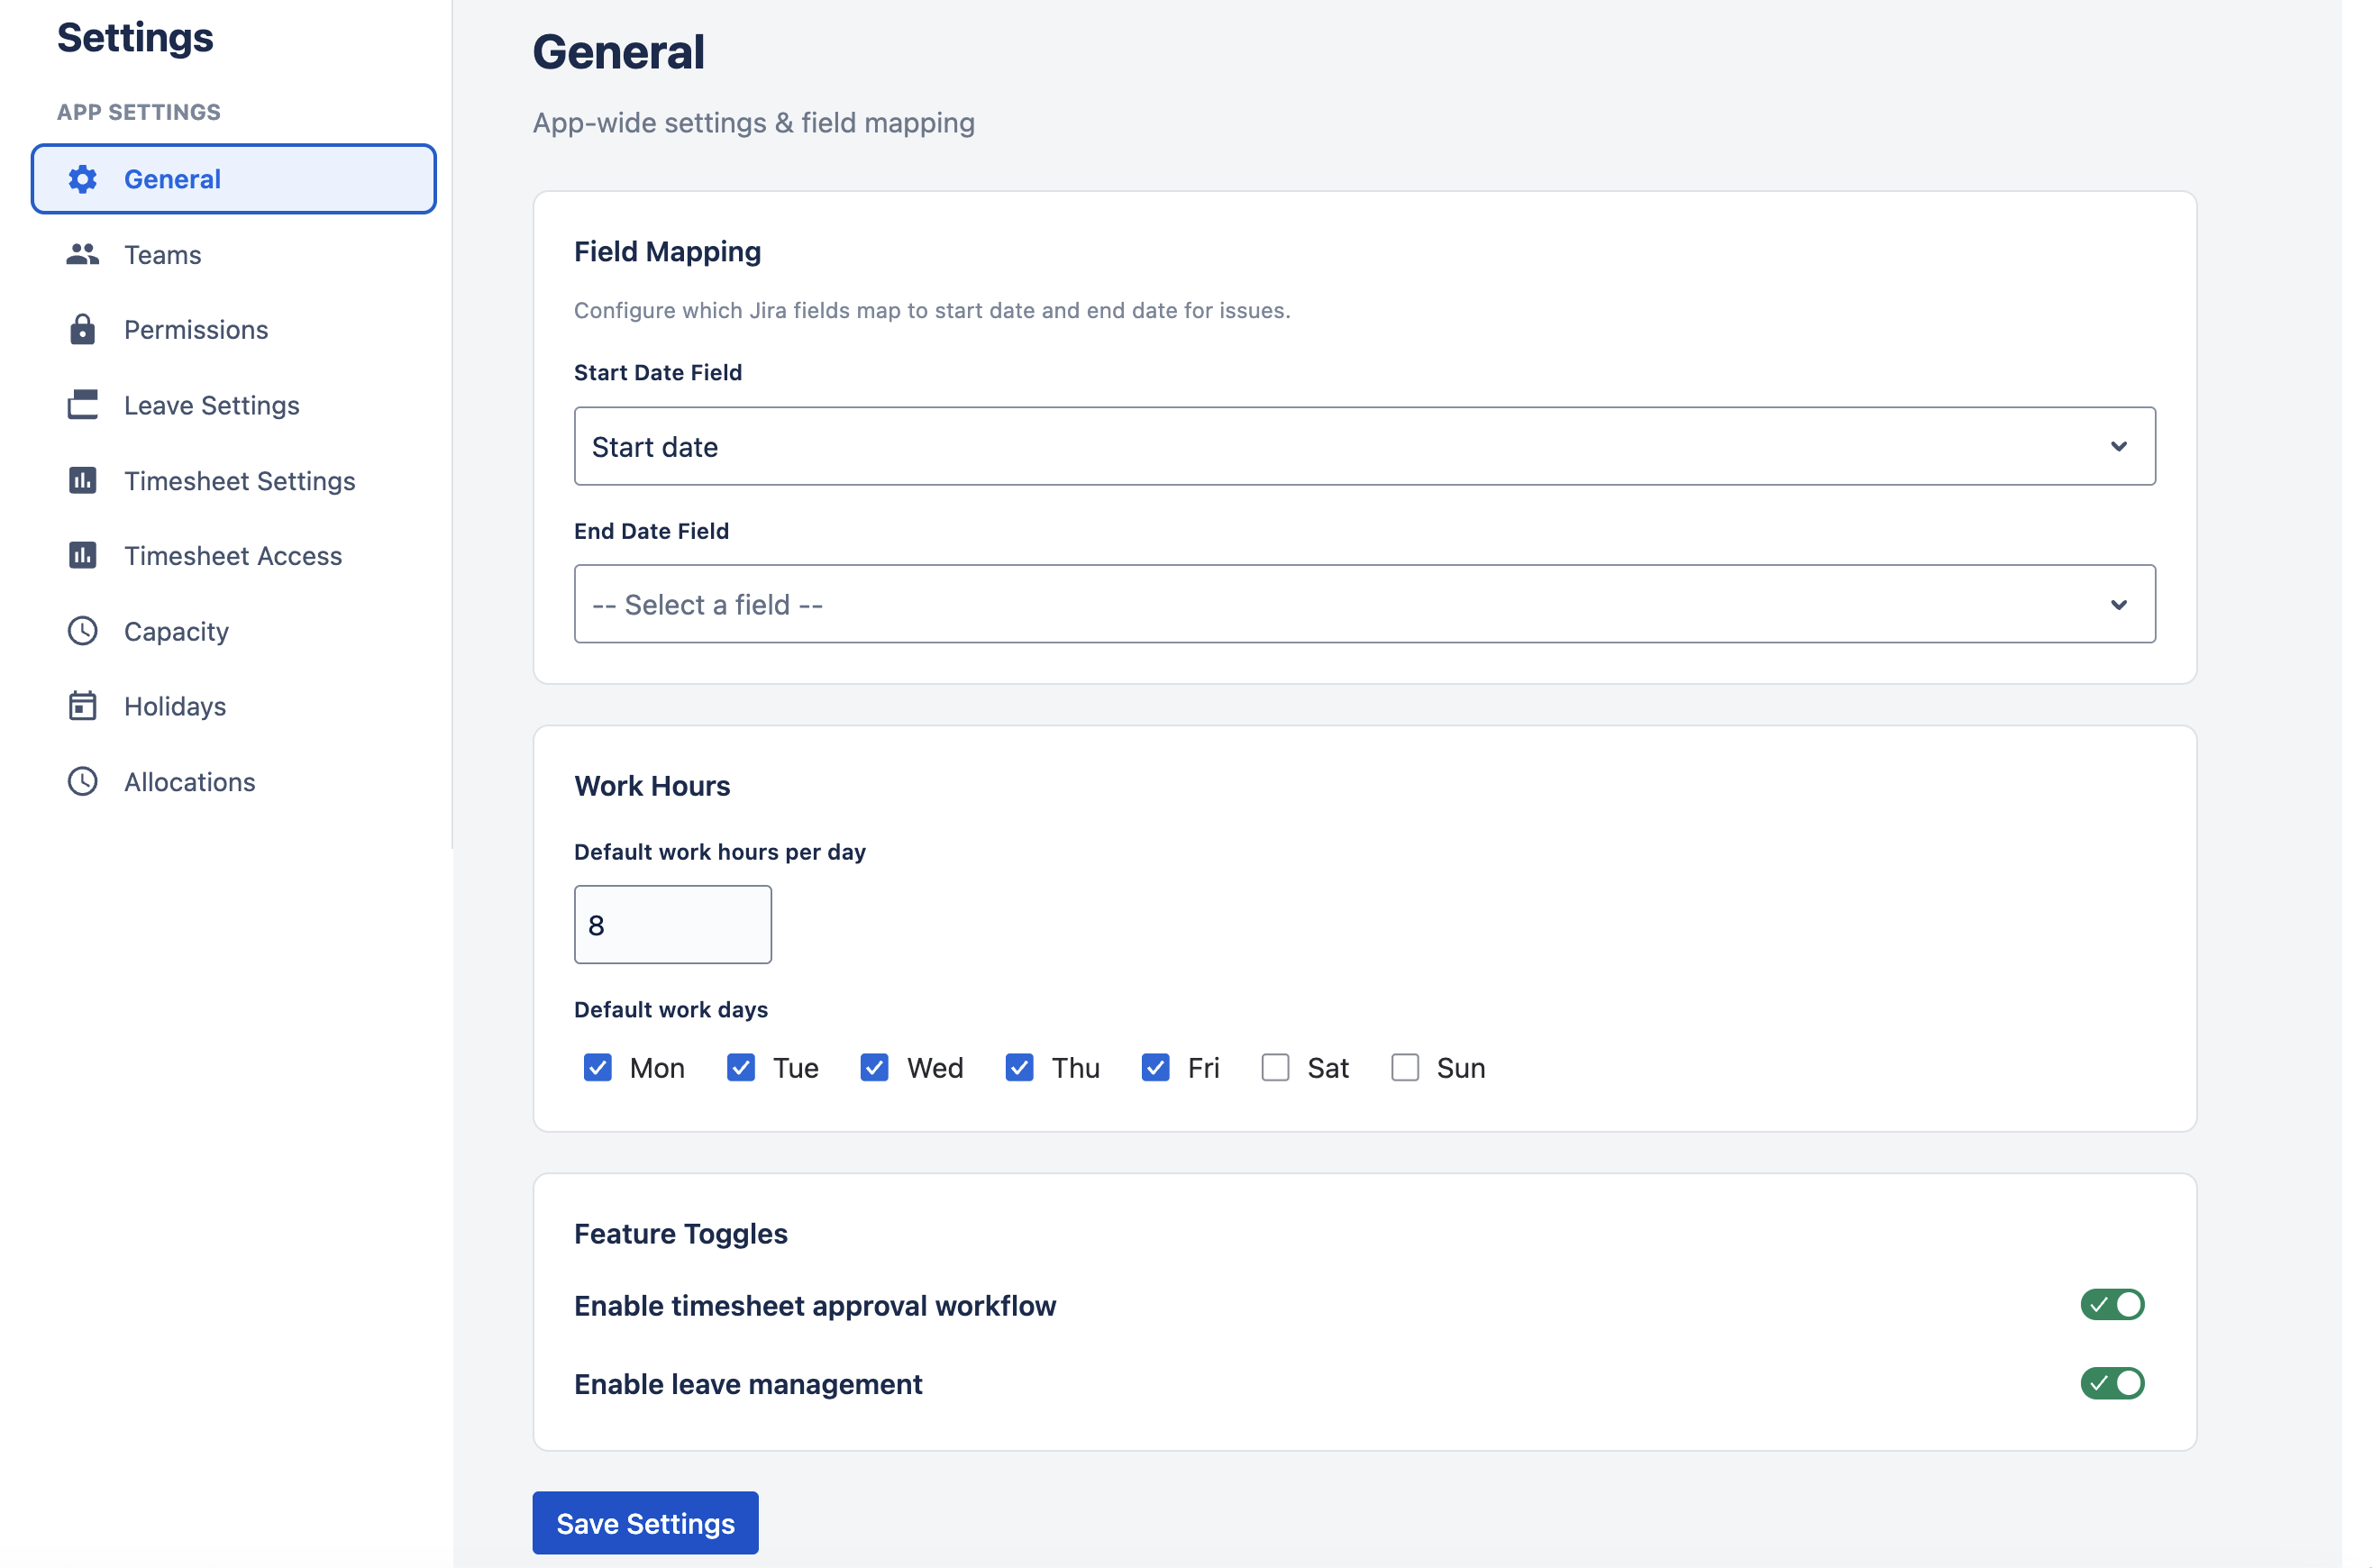
Work Hours per Day
Set the default number of working hours per day (e.g., 8 hours). This value is used as the baseline for capacity calculations, workload indicators, and utilization reports. Individual capacity schemes can override this per user.
Work Days per Week
Select which days of the week are working days (Monday through Sunday). Non-working days are excluded from workload calculations and highlighted on the scheduler timeline. The default is Monday through Friday.
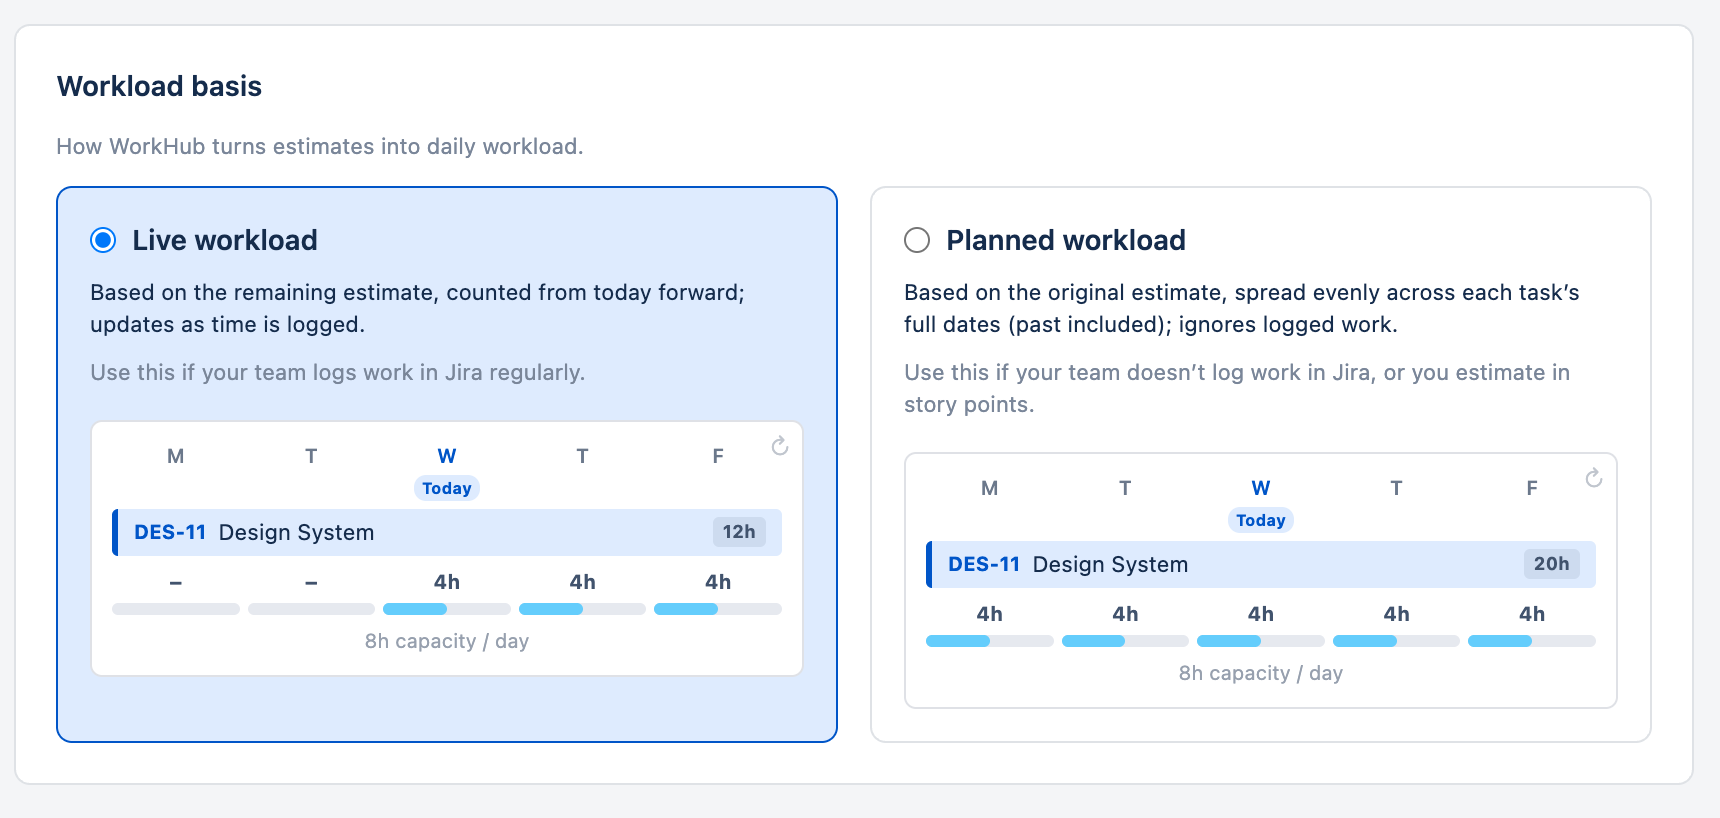
Workload Basis
Chooses how the plugin turns task estimates into daily workload. This affects the Scheduler's workload indicator and the Utilization Forecast and Project Resources reports.
- Live workload — workload reflects the work still remaining on each task, taken from Jira's time-tracking Remaining Estimate field, counted from today forward, and updates as people log time. Best for teams that log work in Jira regularly. This is the default and matches how the plugin behaved before.
- Planned workload — workload spreads each task's full estimate, taken from Jira's time-tracking Original Estimate field, evenly across its whole duration (including past days). Best for teams that rarely log work, such as teams that estimate in story points.
An Estimate source choice under the Planned option picks which estimate feeds the Planned basis: the original estimate (the default) or the remaining estimate, which decreases as work is logged. The choice applies site-wide, to both the Scheduler and the forecast reports.
A Resolved issues choice in the same section decides whether issues in the Done status category keep counting toward workload (the default) or are left out of the workload indicators and forecast reports entirely.
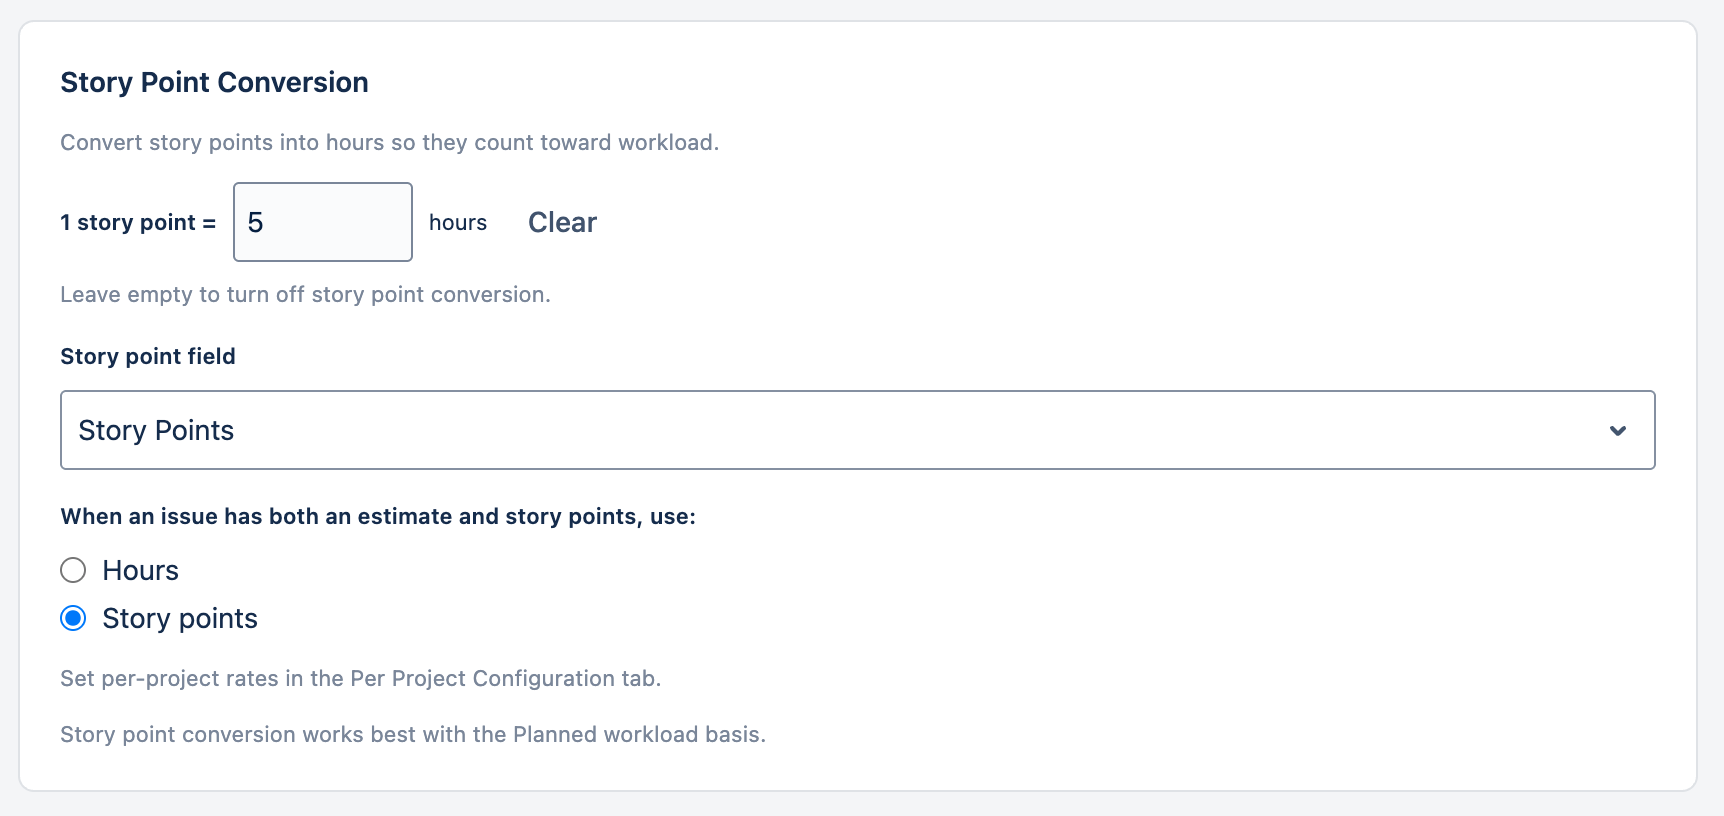
Story Point Conversion
Lets you convert story points into hours so story-point-estimated work still counts toward workload and capacity. Set how many hours one story point represents and pick which field holds story points. When a task has both a normal time estimate and story points, you choose which one is used. Estimates still display in story points on the tasks — the conversion only affects the workload and capacity calculation, and it pairs best with the Planned workload basis. Different projects can use different rates via the Per Project Configuration tab.
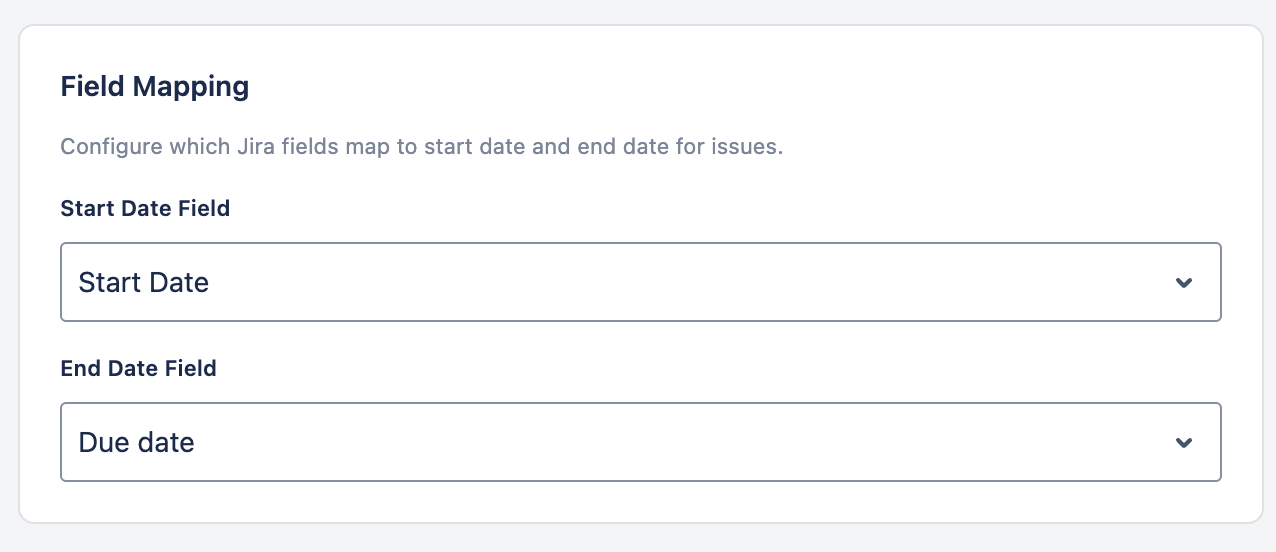
Field Mapping Back to top
Field Mapping configures which Jira custom fields represent the Start Date and End Date for issues on the scheduler timeline. Without this mapping, WorkHub cannot determine where to place issues on the timeline.
Field Requirements
Both mappings accept any date or date-time field. For an issue to be schedulable, the mapped fields must be available in its project: the field's context must include the project, and the field must not be hidden in the project's field configuration. Team-managed projects don't share company-managed custom fields, so if you schedule work across both project types, Jira's standard Start date and Due date fields are the safest choice.
The scheduler both reads and writes the mapped fields: issue bars are placed from their values, and dragging, resizing, or scheduling an issue writes the new dates back to the issue. Because dates live in regular Jira fields, they stay visible to boards, JQL searches, dashboards, and other Jira apps.
WorkHub Storage (No Jira Field)
Either mapping can also be set to WorkHub storage (no Jira field). WorkHub then saves the date itself instead of writing it to a Jira field (technically, as an issue property), so scheduling works in every project — including team-managed ones — with no field configuration required. These dates are searchable in JQL via workhubStartDate and workhubEndDate and visible throughout WorkHub — including the WorkHub panel on each Jira issue — but they don't fill Jira's own date fields, so boards and other apps won't see them, and they can only be edited through WorkHub.
The two mappings are independent, and mixing them is often the sweet spot. A common setup: Start Date → WorkHub storage and End Date → Due date. Every Jira project has the built-in Due date field, so due dates stay visible on boards and issue views for the whole team, while the start date — which many sites have no universal field for — works everywhere without any field configuration.
A few Jira system date fields — such as Created, Updated and Resolved — appear in the dropdown but are read-only. You can map to them so the scheduler reads dates from them, but drag-and-drop and resize on the timeline can't change them, since Jira rejects any write. WorkHub shows a warning when a read-only field is selected. Choose an editable date field (or WorkHub storage) if you need to reschedule issues from the timeline.
First-Run Setup
The first time the plugin is opened, a Field Setup Dialog is displayed automatically. It guides the administrator to choose where start and end dates are stored. By default it pre-selects WorkHub storage for both dates.
Updating Field Mapping Later
After initial setup, field mapping can be changed at any time from Settings → General or by accessing the Field Mapping configuration directly. The dropdown lists all date-type custom fields available in your Jira instance. Note that the scheduler reads dates from the mapped fields — after remapping, issues whose dates live in the previously mapped field may disappear from the timeline until dates are set in the new field.
Supported Field Types
WorkHub scans your Jira instance for date and datetime custom fields. Common choices include "Start date", "Due date", "Target start", or any custom date field your organization has configured.
Field Not Available in a Project
Jira only accepts a date update when the mapped field is available in the issue's project: the field's context (scope) must include that project, the field must not be hidden in the project's field configuration, and team-managed projects use their own fields. Because availability is configured per project, updates can fail in one project while working in others. When this happens, the error notification offers a How to fix action explaining the resolutions: ask a Jira admin to make the field available to the project (see Configure field contexts and Manage field configurations in the Atlassian documentation), map a different date field that is available in all your projects, or switch the mapping to WorkHub storage to avoid field availability entirely.
Capacity Back to top
The Capacity tab lets you create and manage capacity schemes — named work schedules that define how many hours each person works per day of the week. Capacity schemes are assigned to individual users or teams, allowing different schedules for full-time, part-time, or compressed work weeks.
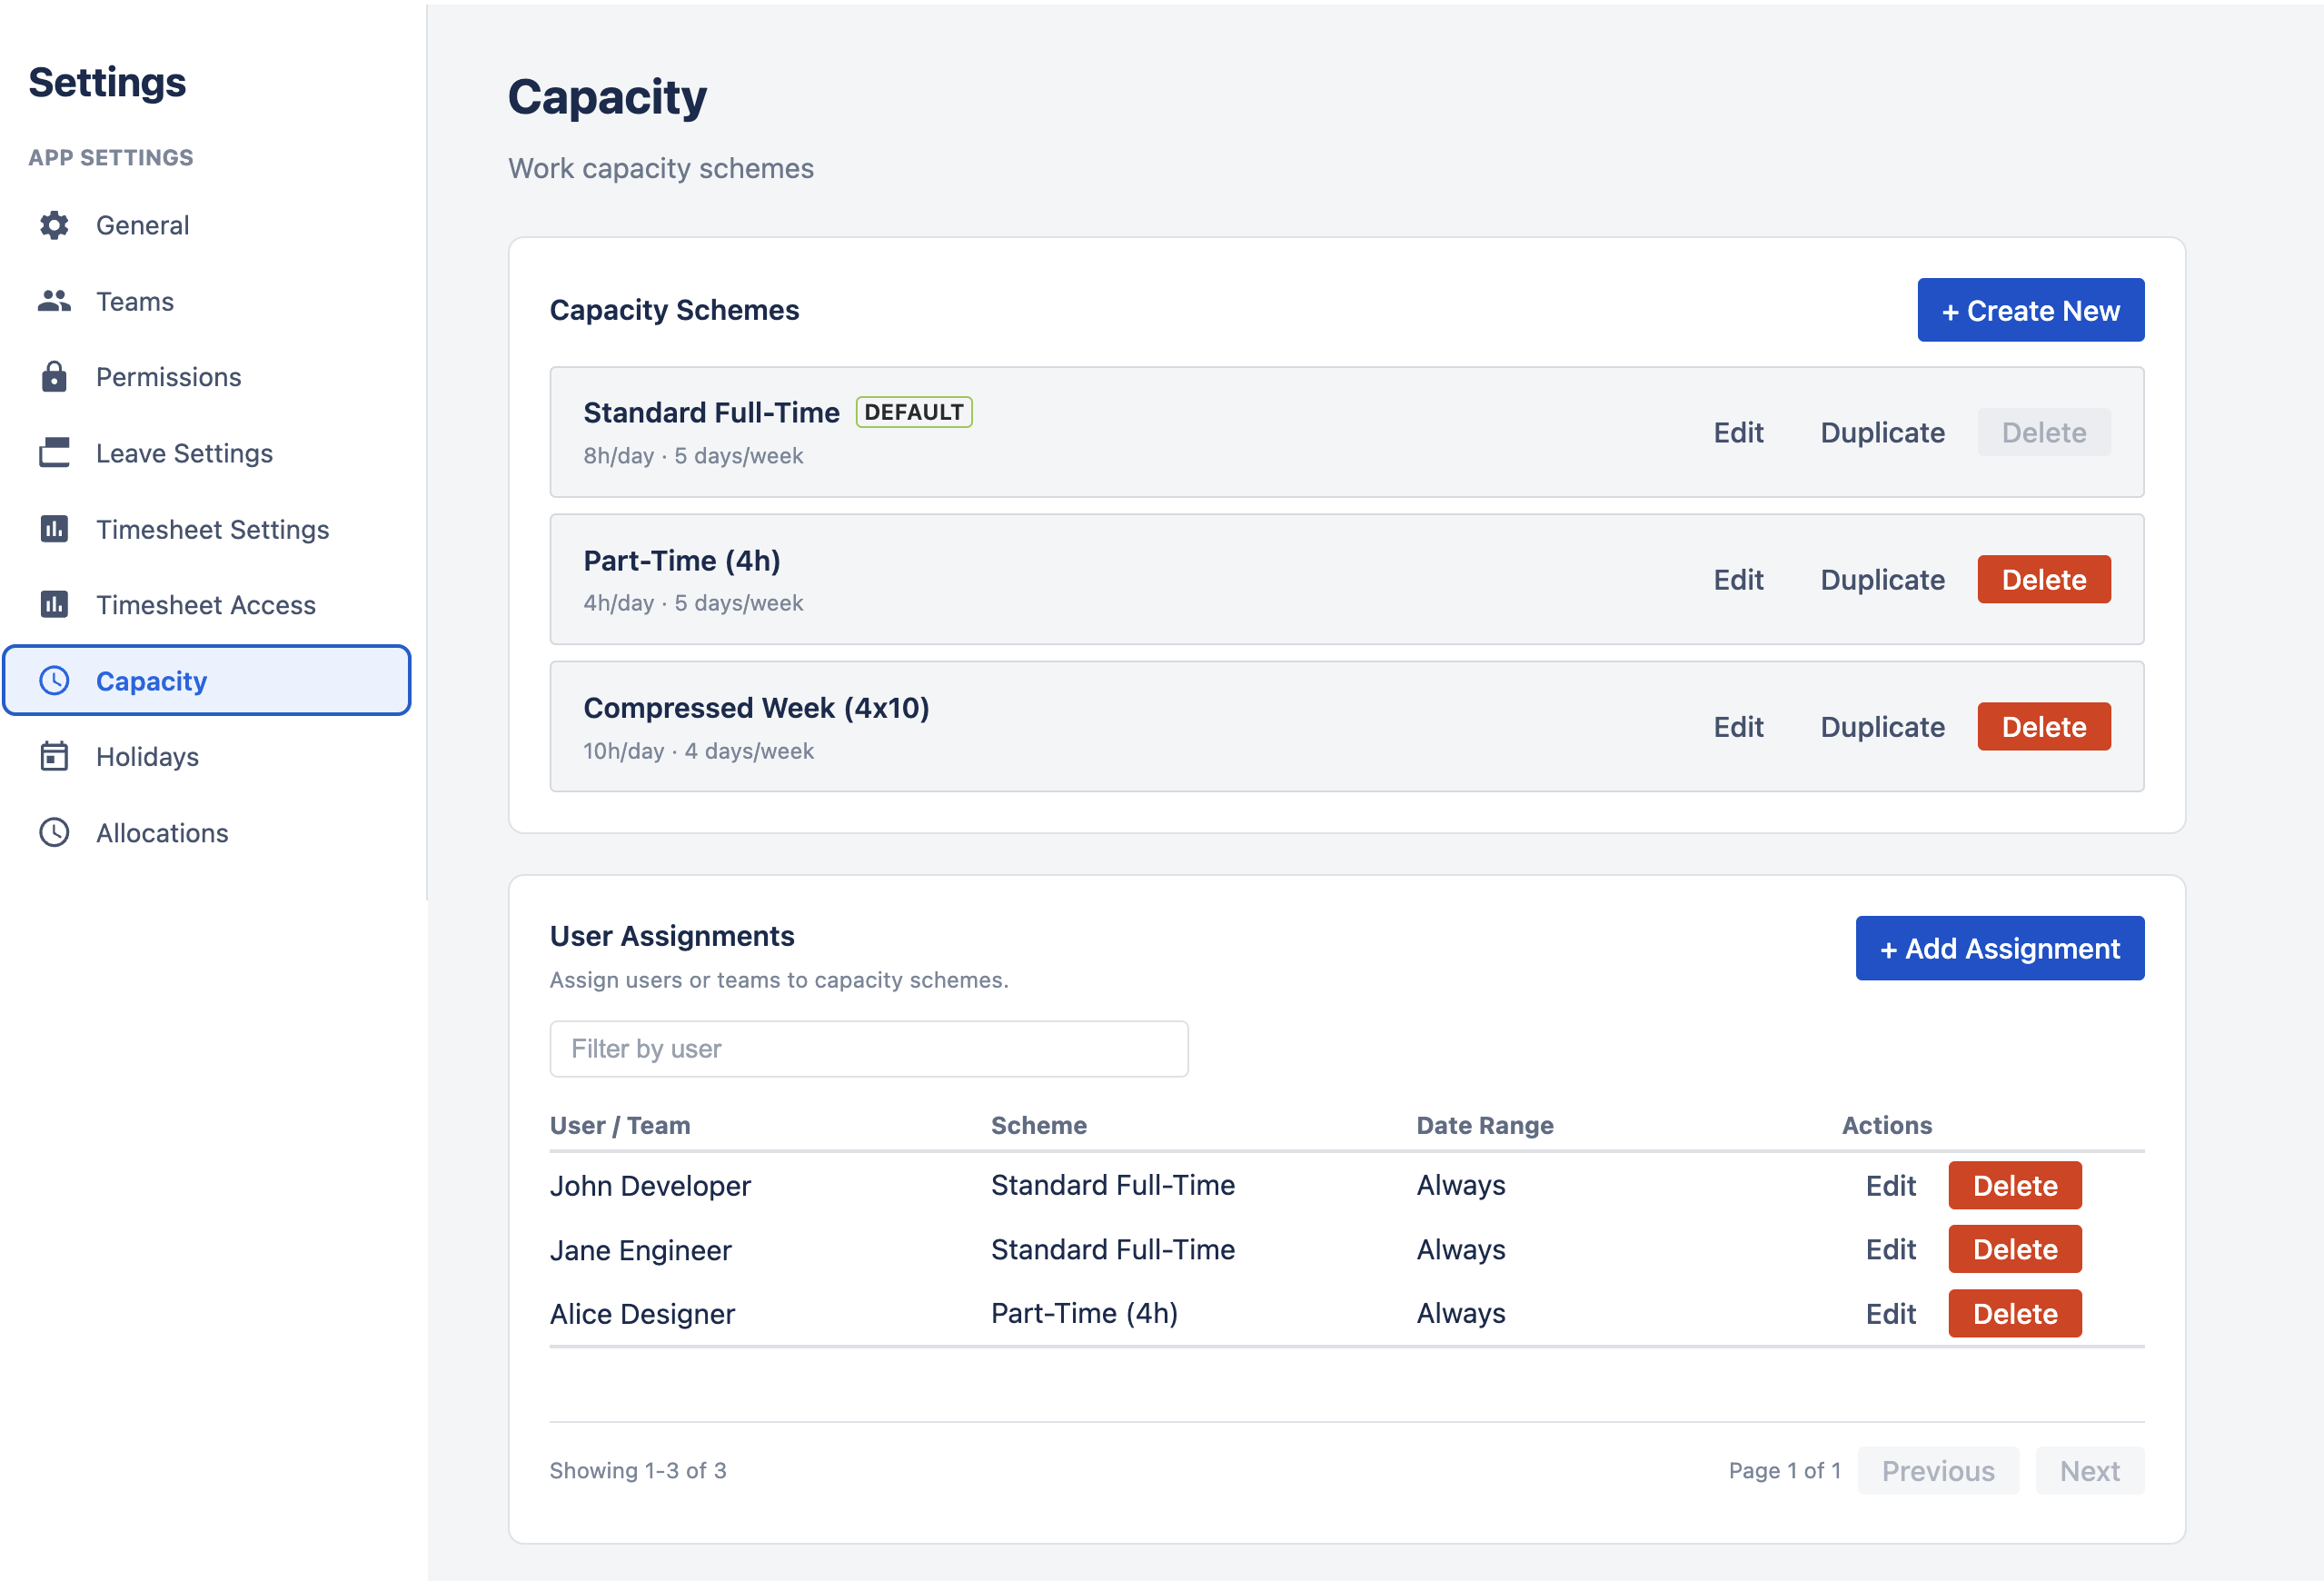
- Standard Full-Time — 8 hours/day, Monday through Friday.
- Part-Time — 4 hours/day, Monday through Friday.
- Compressed Week — 10 hours/day Monday through Thursday, off Friday.
- Custom schemes — create any combination of hours per weekday.
Capacity schemes directly affect workload indicators on the scheduler, utilization calculations in reports, and available hours in timesheet views.
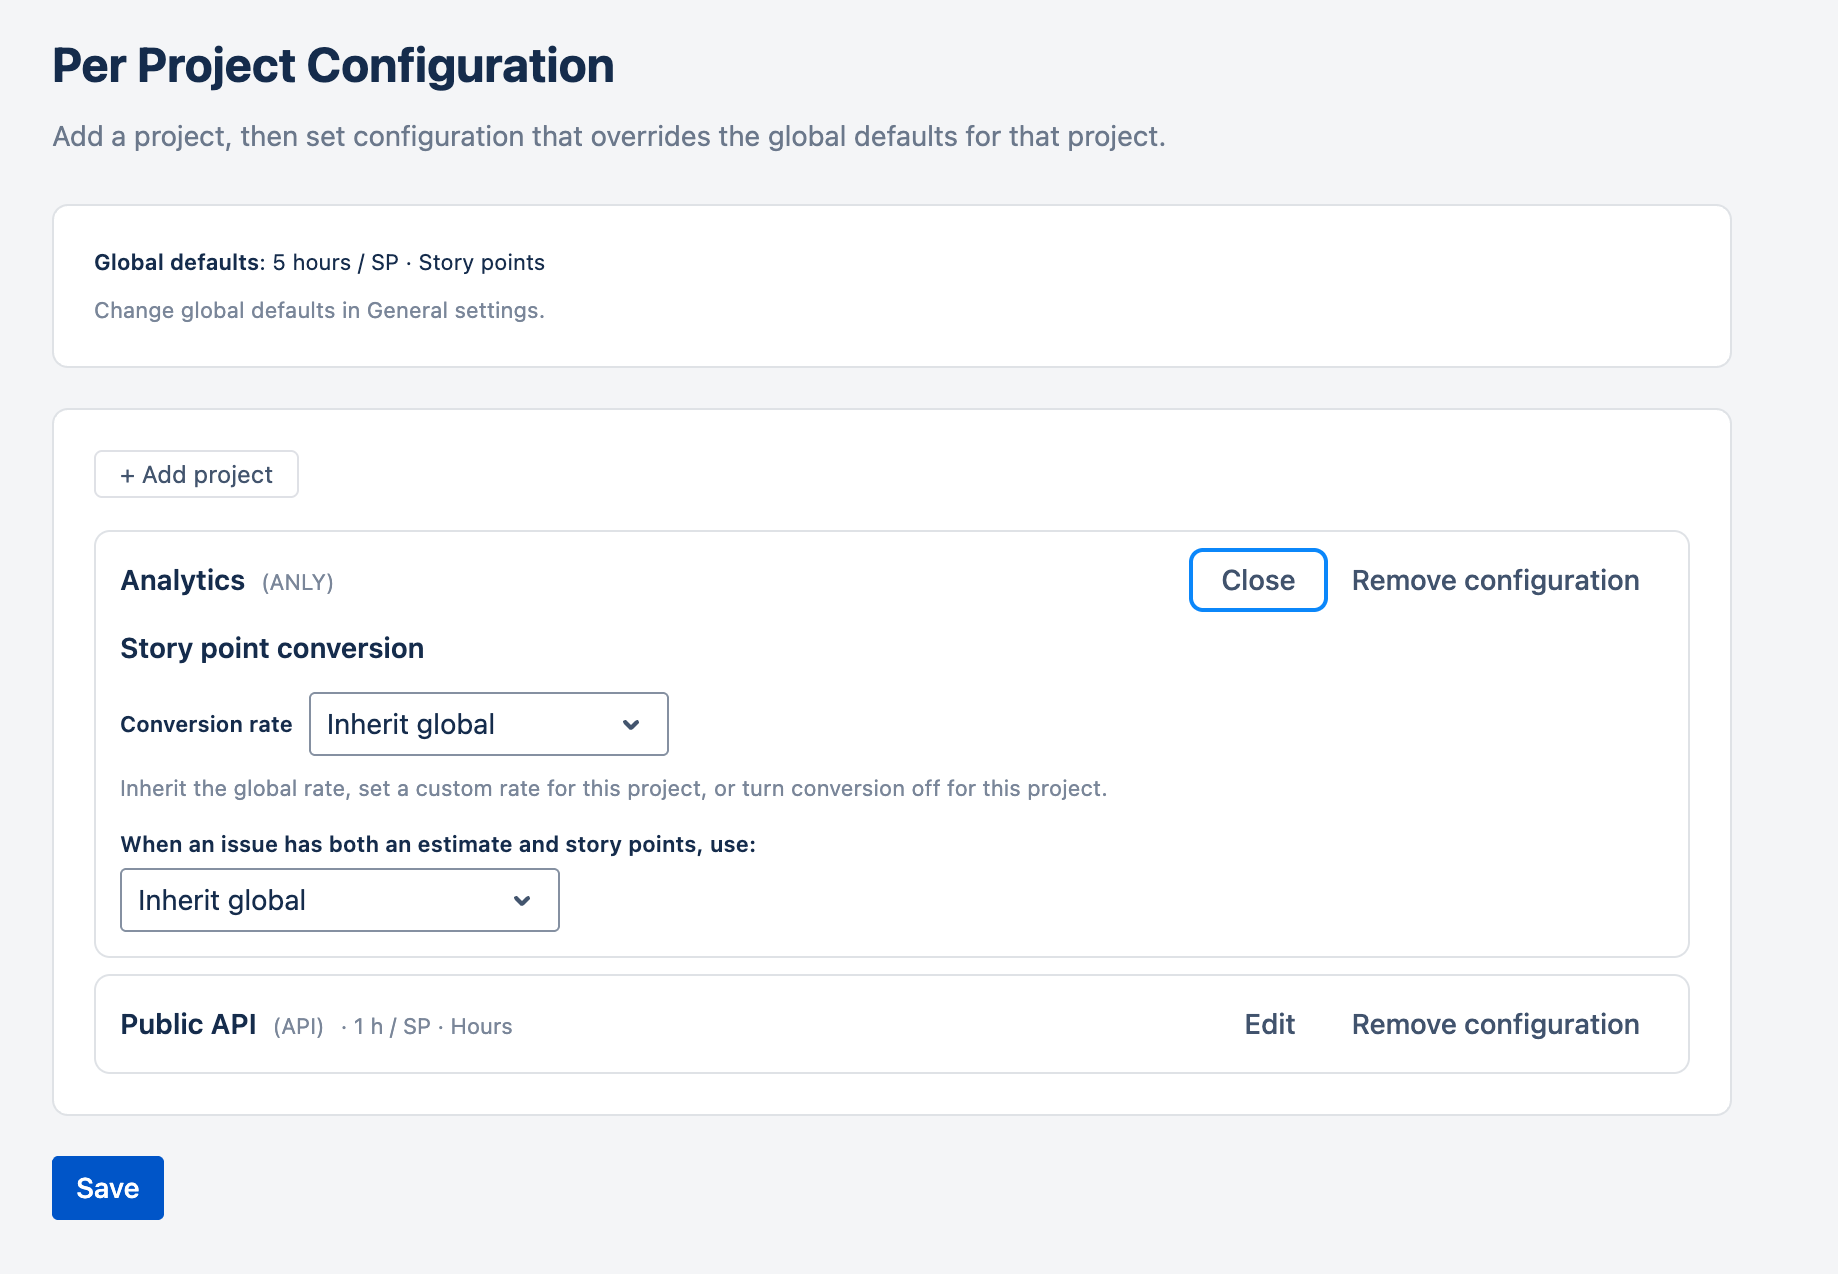
Per Project Configuration Back to top
The Per Project Configuration area lets you override the global defaults for individual projects. Add a project, then set configuration that applies only to that project.
Today this covers the story point conversion rate: for each added project you can inherit the site-wide default, set the project's own hours-per-story-point rate, or turn conversion off for that project — independently of the global default set in General → Story Point Conversion. Projects you haven't added simply use the global defaults.
Holidays Back to top
The Holidays tab lets you create and manage holiday calendars — named sets of public holidays that can be assigned to teams or individual users. When a holiday falls on a working day, it is excluded from capacity calculations, workload indicators, and report totals.
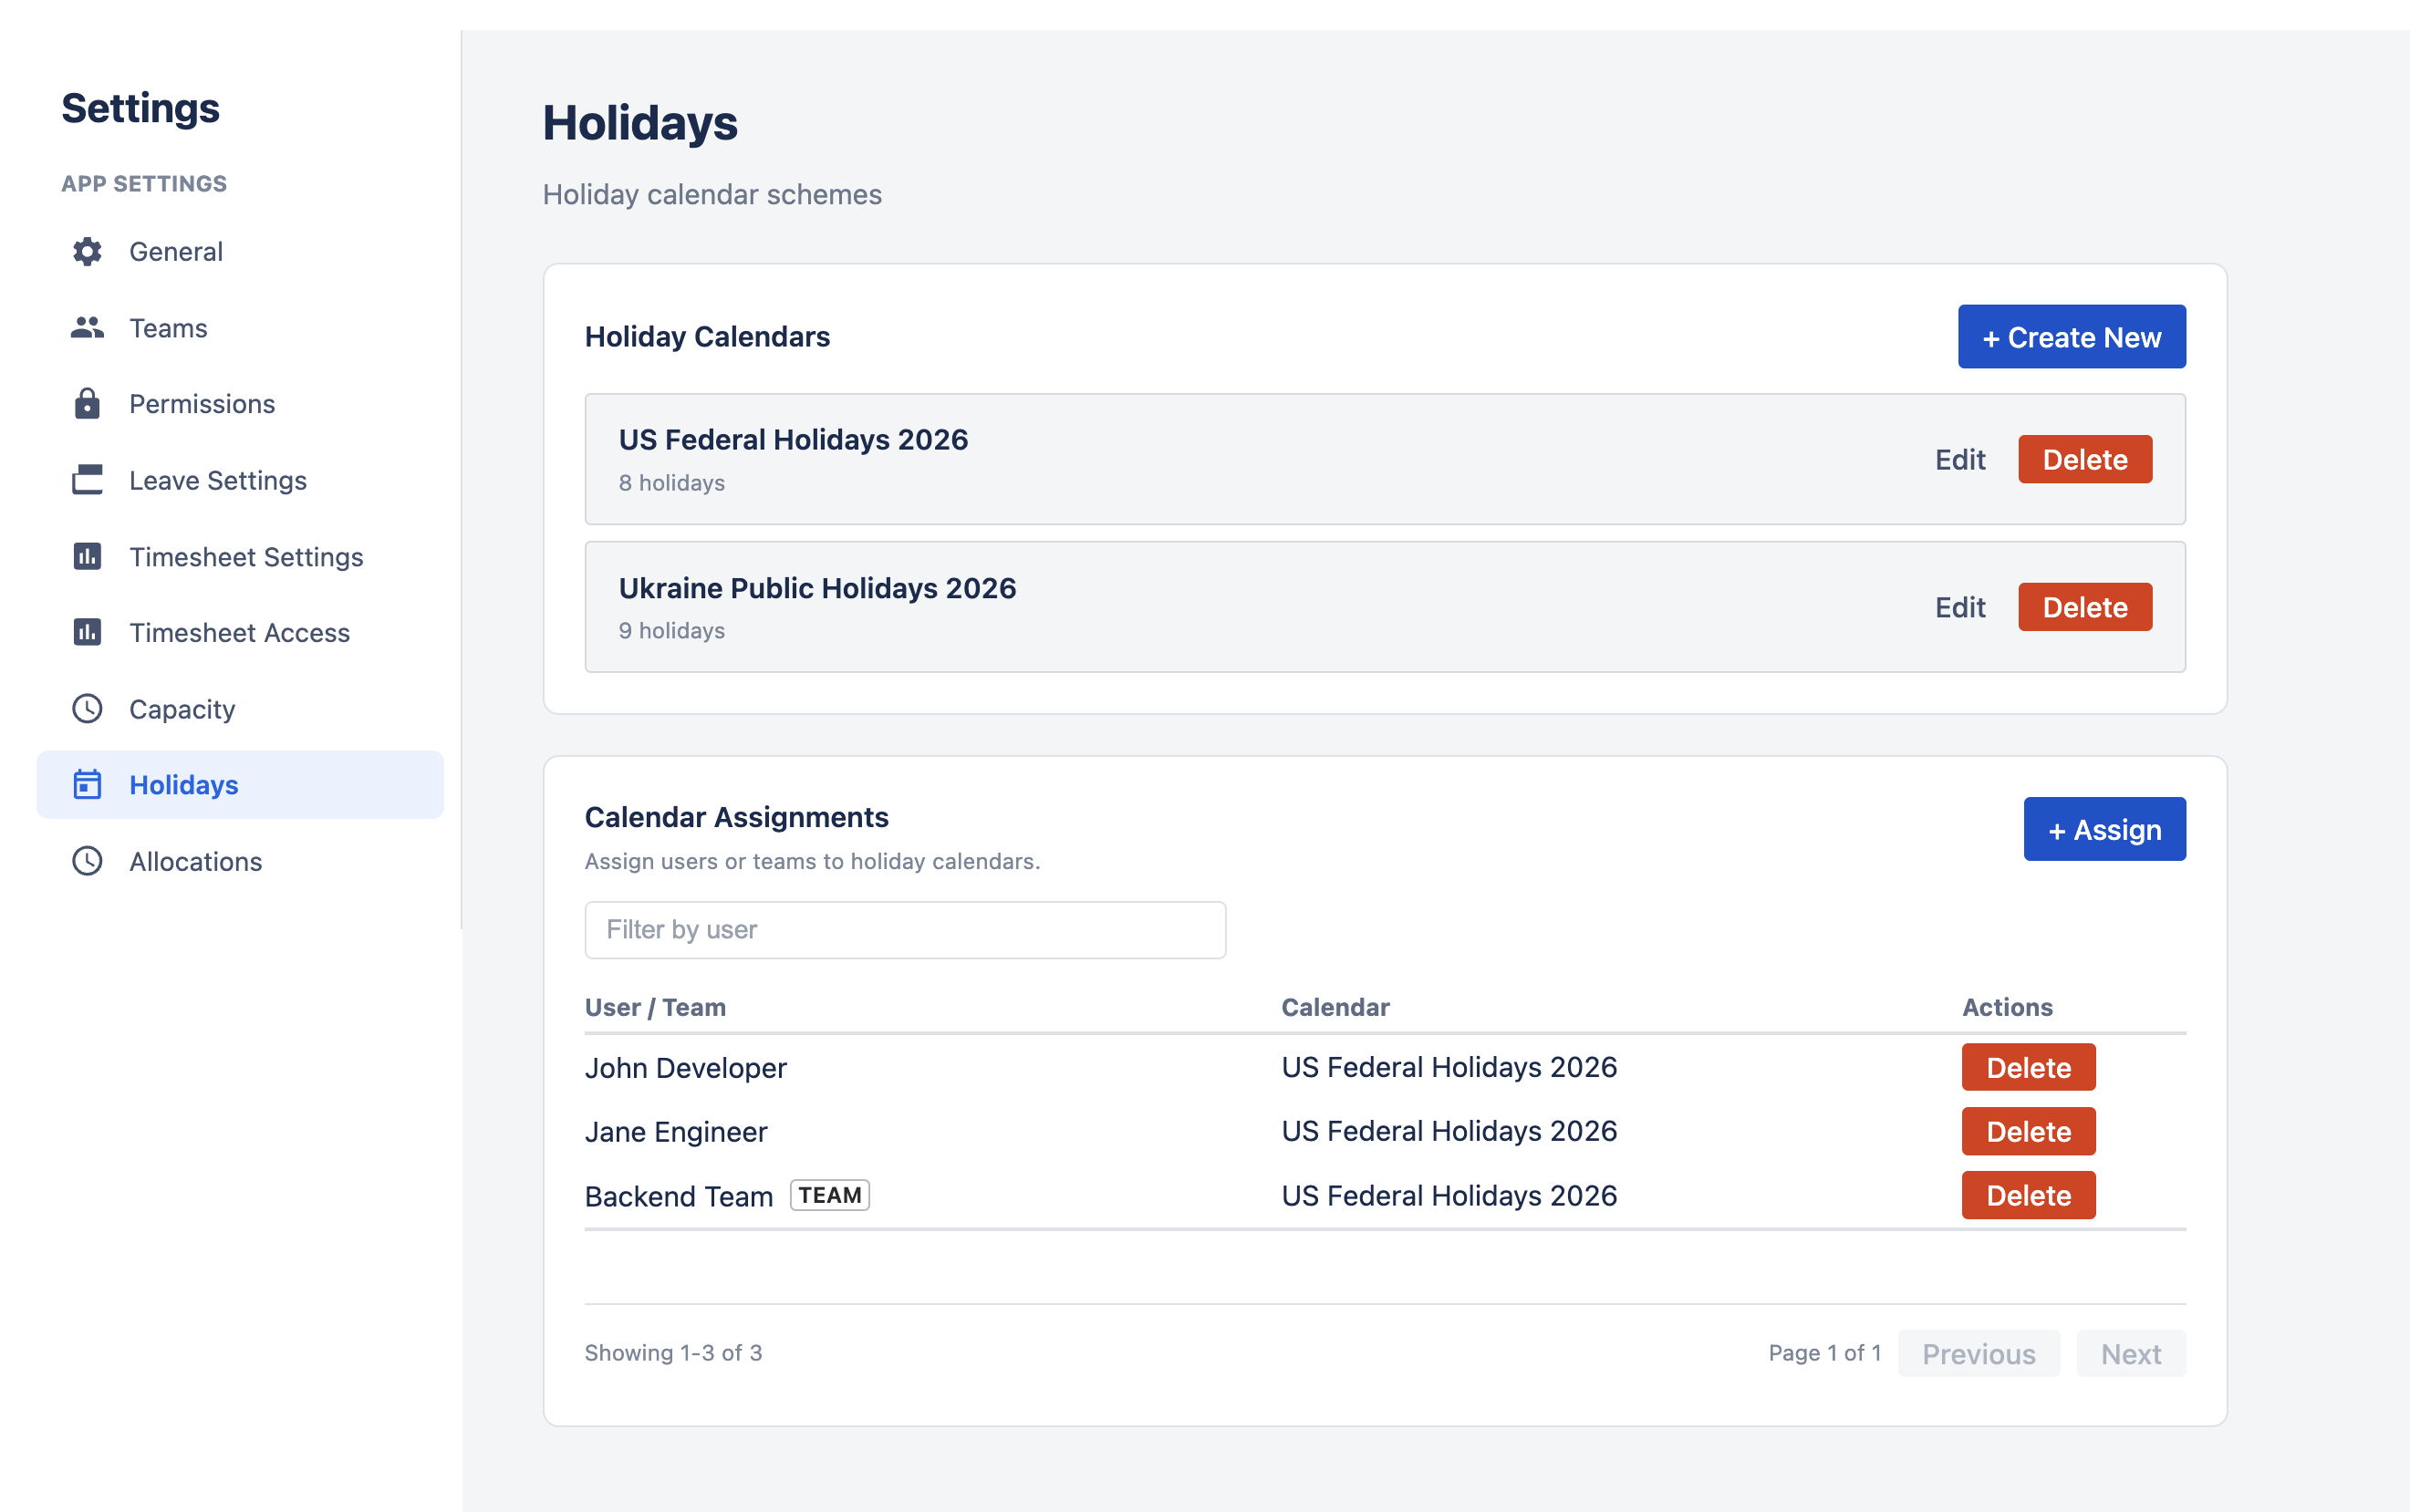
- Create calendars — define a named calendar (e.g., "US Federal Holidays 2026" or "Ukraine Public Holidays 2026").
- Add holidays — add individual holiday dates with names to a calendar.
- Assign calendars — assign calendars to teams or specific users. A user inherits holidays from their assigned calendar.
Leave Settings Back to top
The Leave Settings tab controls the leave approval workflow toggle, leave type definitions, and leave approver assignments. These settings determine whether leave requests need approval, what types of leave users can request, and who approves those requests.
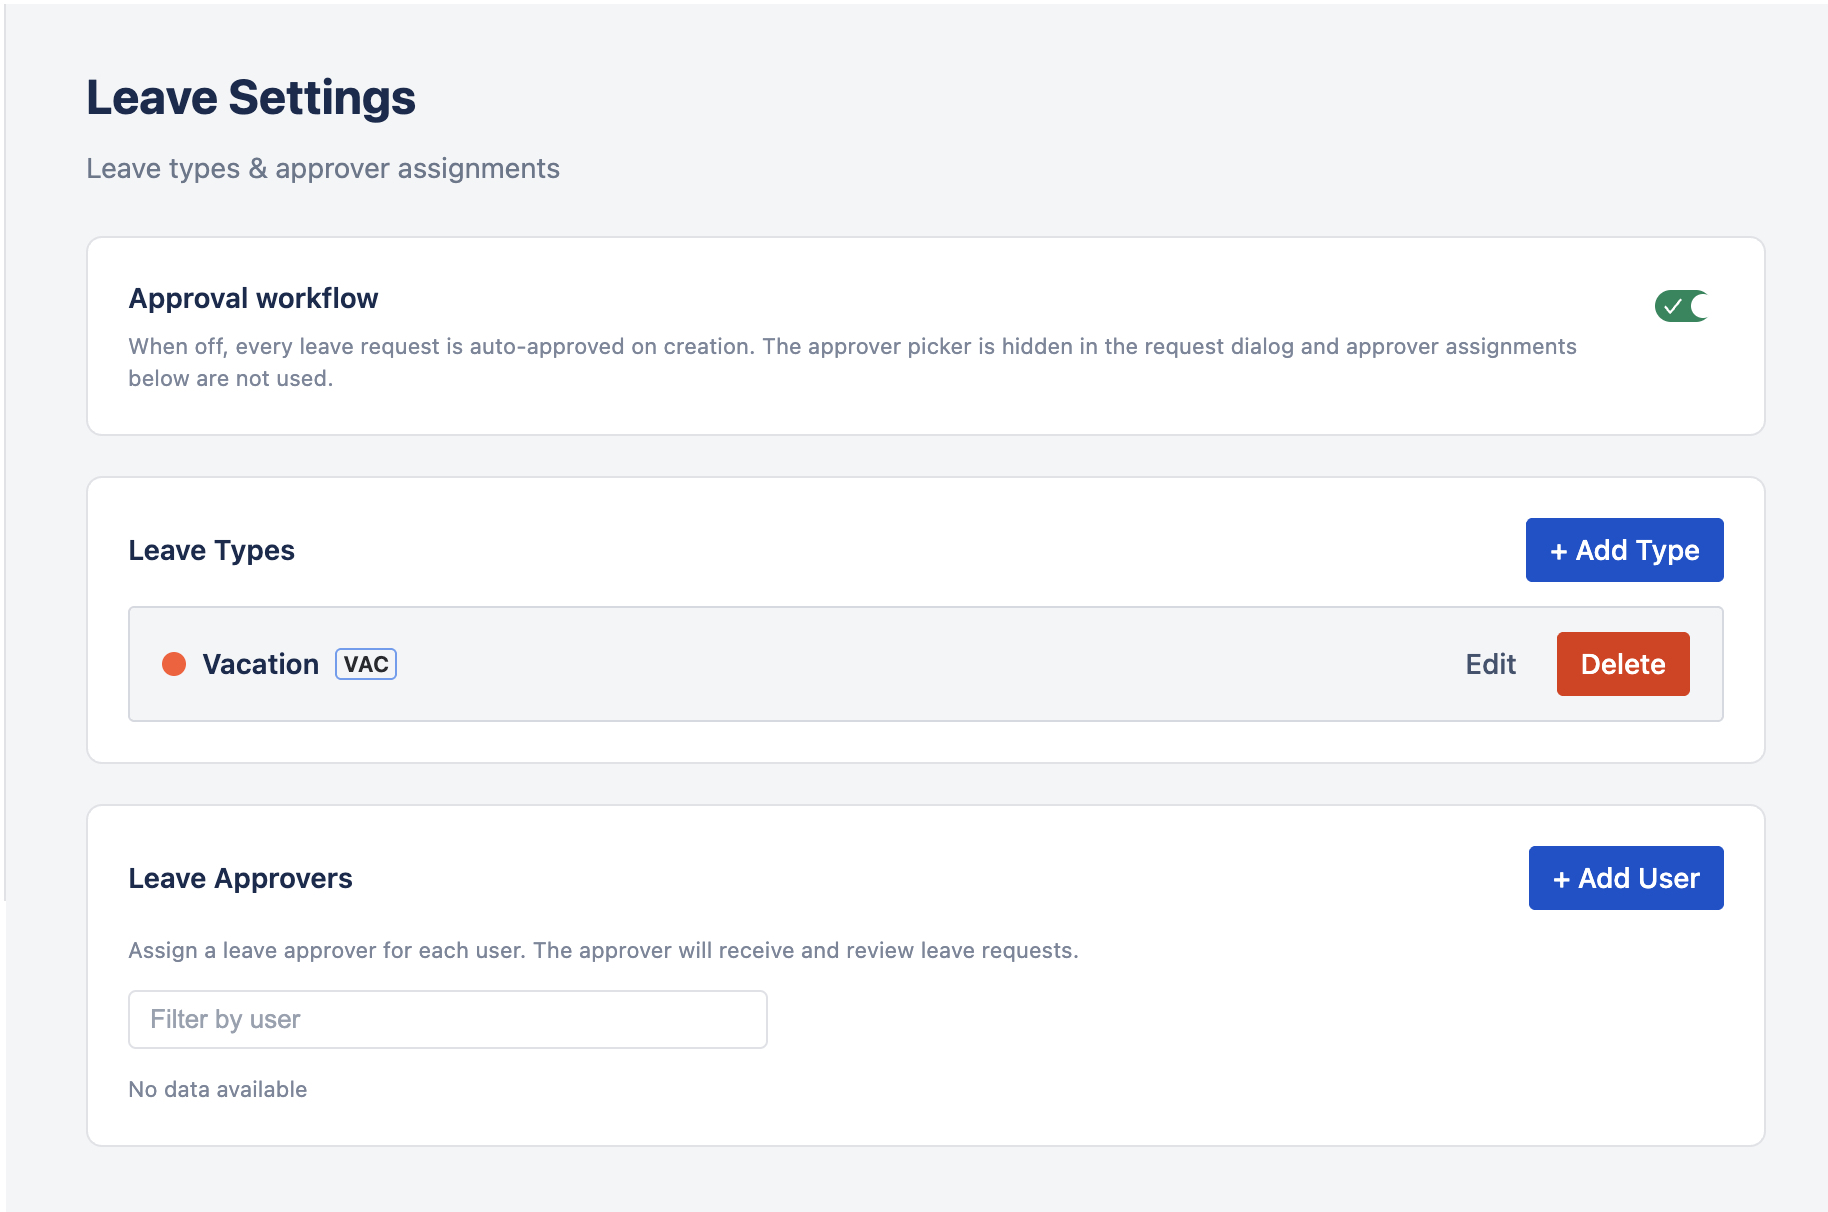
Approval Workflow
Master toggle for the entire leave approval workflow. When off, every leave request is auto-approved on creation — the approver picker is hidden in the Request Leave dialog and approver assignments below are saved but not consulted. App admins or org managers can still create leave on behalf of any user, also team managers can create leave on behalf of users from team they are managing; those requests are also created in Approved status. Turn this on to require approver review (Pending → Approved/Rejected) for all new requests.
With approval off, the owner gains direct control over their own approved leaves — they can edit, recall (which goes straight to Recalled, skipping Recalling), and drag/resize the bar on the Resource Scheduler. With approval on, an approved leave is locked and the owner must request a recall through the approver. See Leave → Approval Workflow for the full state machine.
Show Recalled/Rejected Leave on Scheduler
Controls whether recalled and rejected leave requests appear as bars on the Resource Scheduler timeline. It is on by default, so recalled and rejected leaves stay visible. Turn it off to hide them and keep the timeline focused on active (pending / approved) leaves. This is a display-only filter — recalled and rejected leaves never count toward capacity, so the workload bars are unchanged either way. The change takes effect the next time the scheduler loads or is refreshed.
Leave Types
Manage the types of leave available to users. Each leave type has:
- Name — the display name (e.g., Vacation, Sick Leave, Personal, Parental).
- Color — the color used on the scheduler timeline and leave calendar to visually distinguish leave types.
- Abbreviation — a short code displayed in compact views (e.g., "VAC", "SL", "PER").
- Allow partial-day requests — when enabled, users can request a set number of hours per day for this leave type instead of a full day off. When off, requests of this type are always full-day.
New installs start with two default types — Vacation (full-day only) and Day off (partial-day enabled). Admins can add, edit, or delete leave types at any time to match their organization's needs.
Timesheet Settings Back to top
Configure the approval workflow, lock behavior, and submission periods for timesheets.
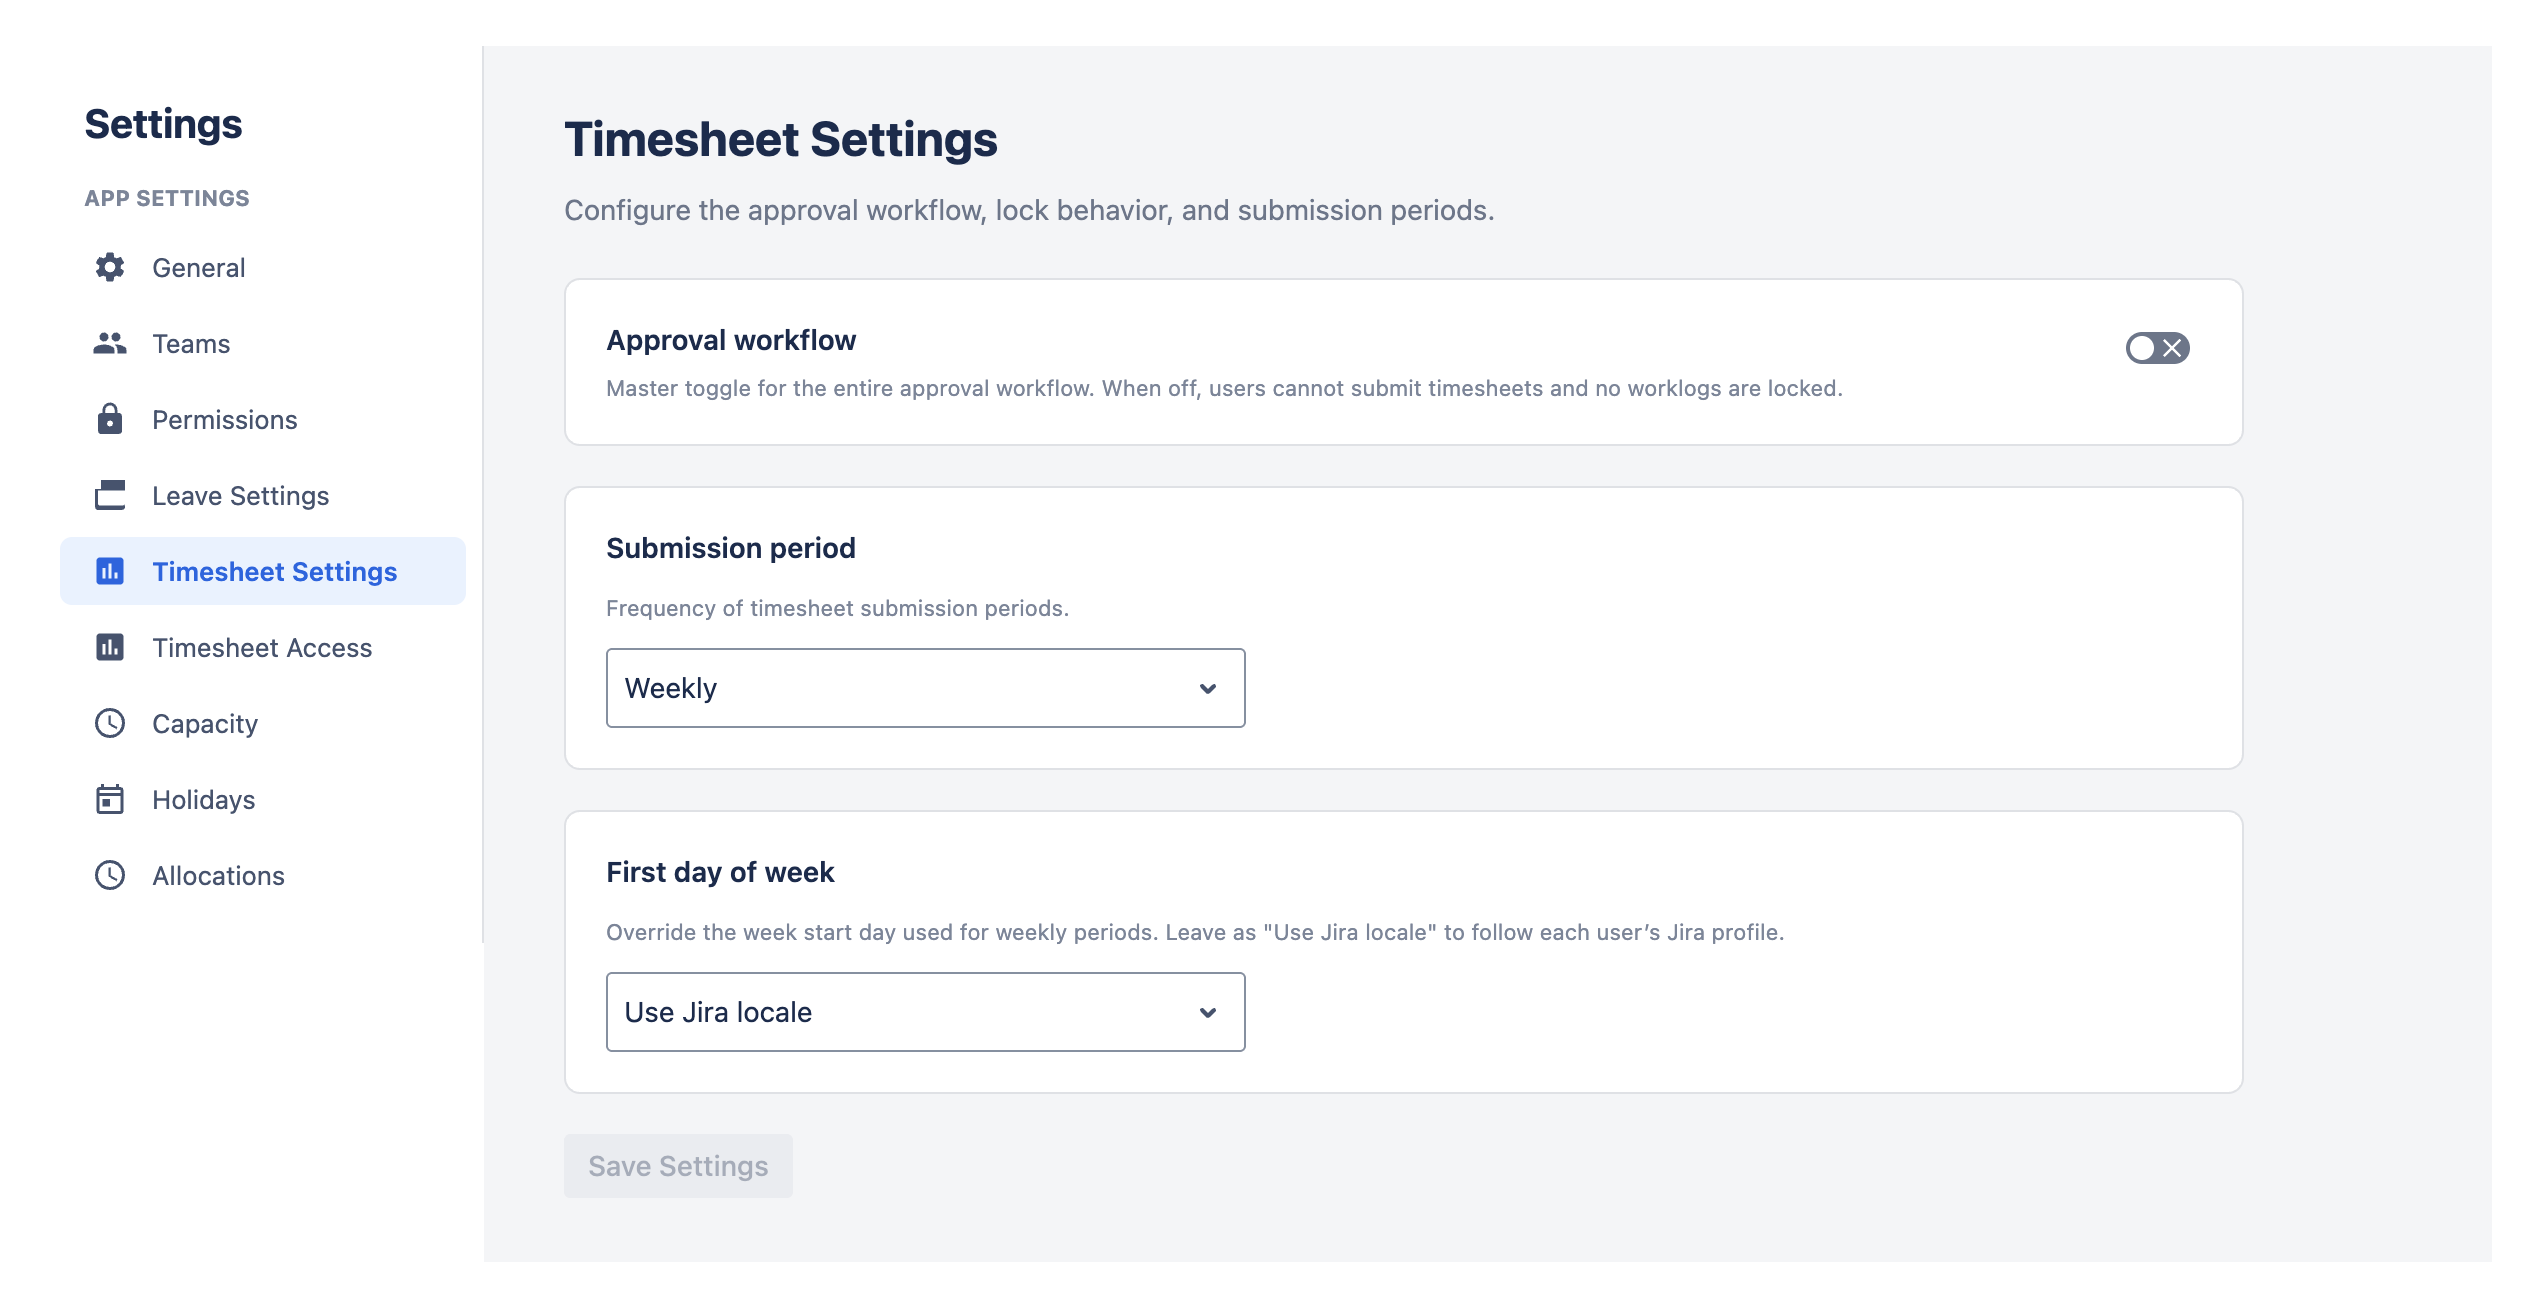
Approval Workflow
Master toggle for the entire approval workflow. When off, users cannot submit timesheets and no worklogs are locked. Turn this on to enable the submit → approve → lock cycle.
Allow Logging Work in the Future
By default, work can only be logged for today or past dates. Turn this on to let users log work for future dates — applies to both Jira issue worklogs and allocation worklogs.
Submission Period
Frequency of timesheet submission periods. Choose Weekly or Monthly. This determines how time ranges are divided when users submit timesheets for approval.
First Day of Week
Override the week start day used for weekly submission periods. Leave as "Use Jira locale" to follow each user's Jira profile locale setting. Select a specific day (e.g., Monday or Sunday) to enforce a consistent week start for all users' timesheet periods.
Worklog Categories
The Worklog Categories tab defines the categories (e.g. Billable, Non-Billable) that people can attach to their time entries, so hours can later be grouped and reported by type of work. Add, rename, and deactivate or reactivate categories in a simple table: a deactivated category disappears from pickers and filters but existing worklogs keep it, and you can reactivate it at any time. A category can only be permanently deleted while no worklogs use it. One category is the permanent default and cannot be deleted or deactivated; entries logged without an explicit choice belong to it. The category picker only appears in the log-work forms, the worklog report, and the timesheet filters once more than one active category exists.
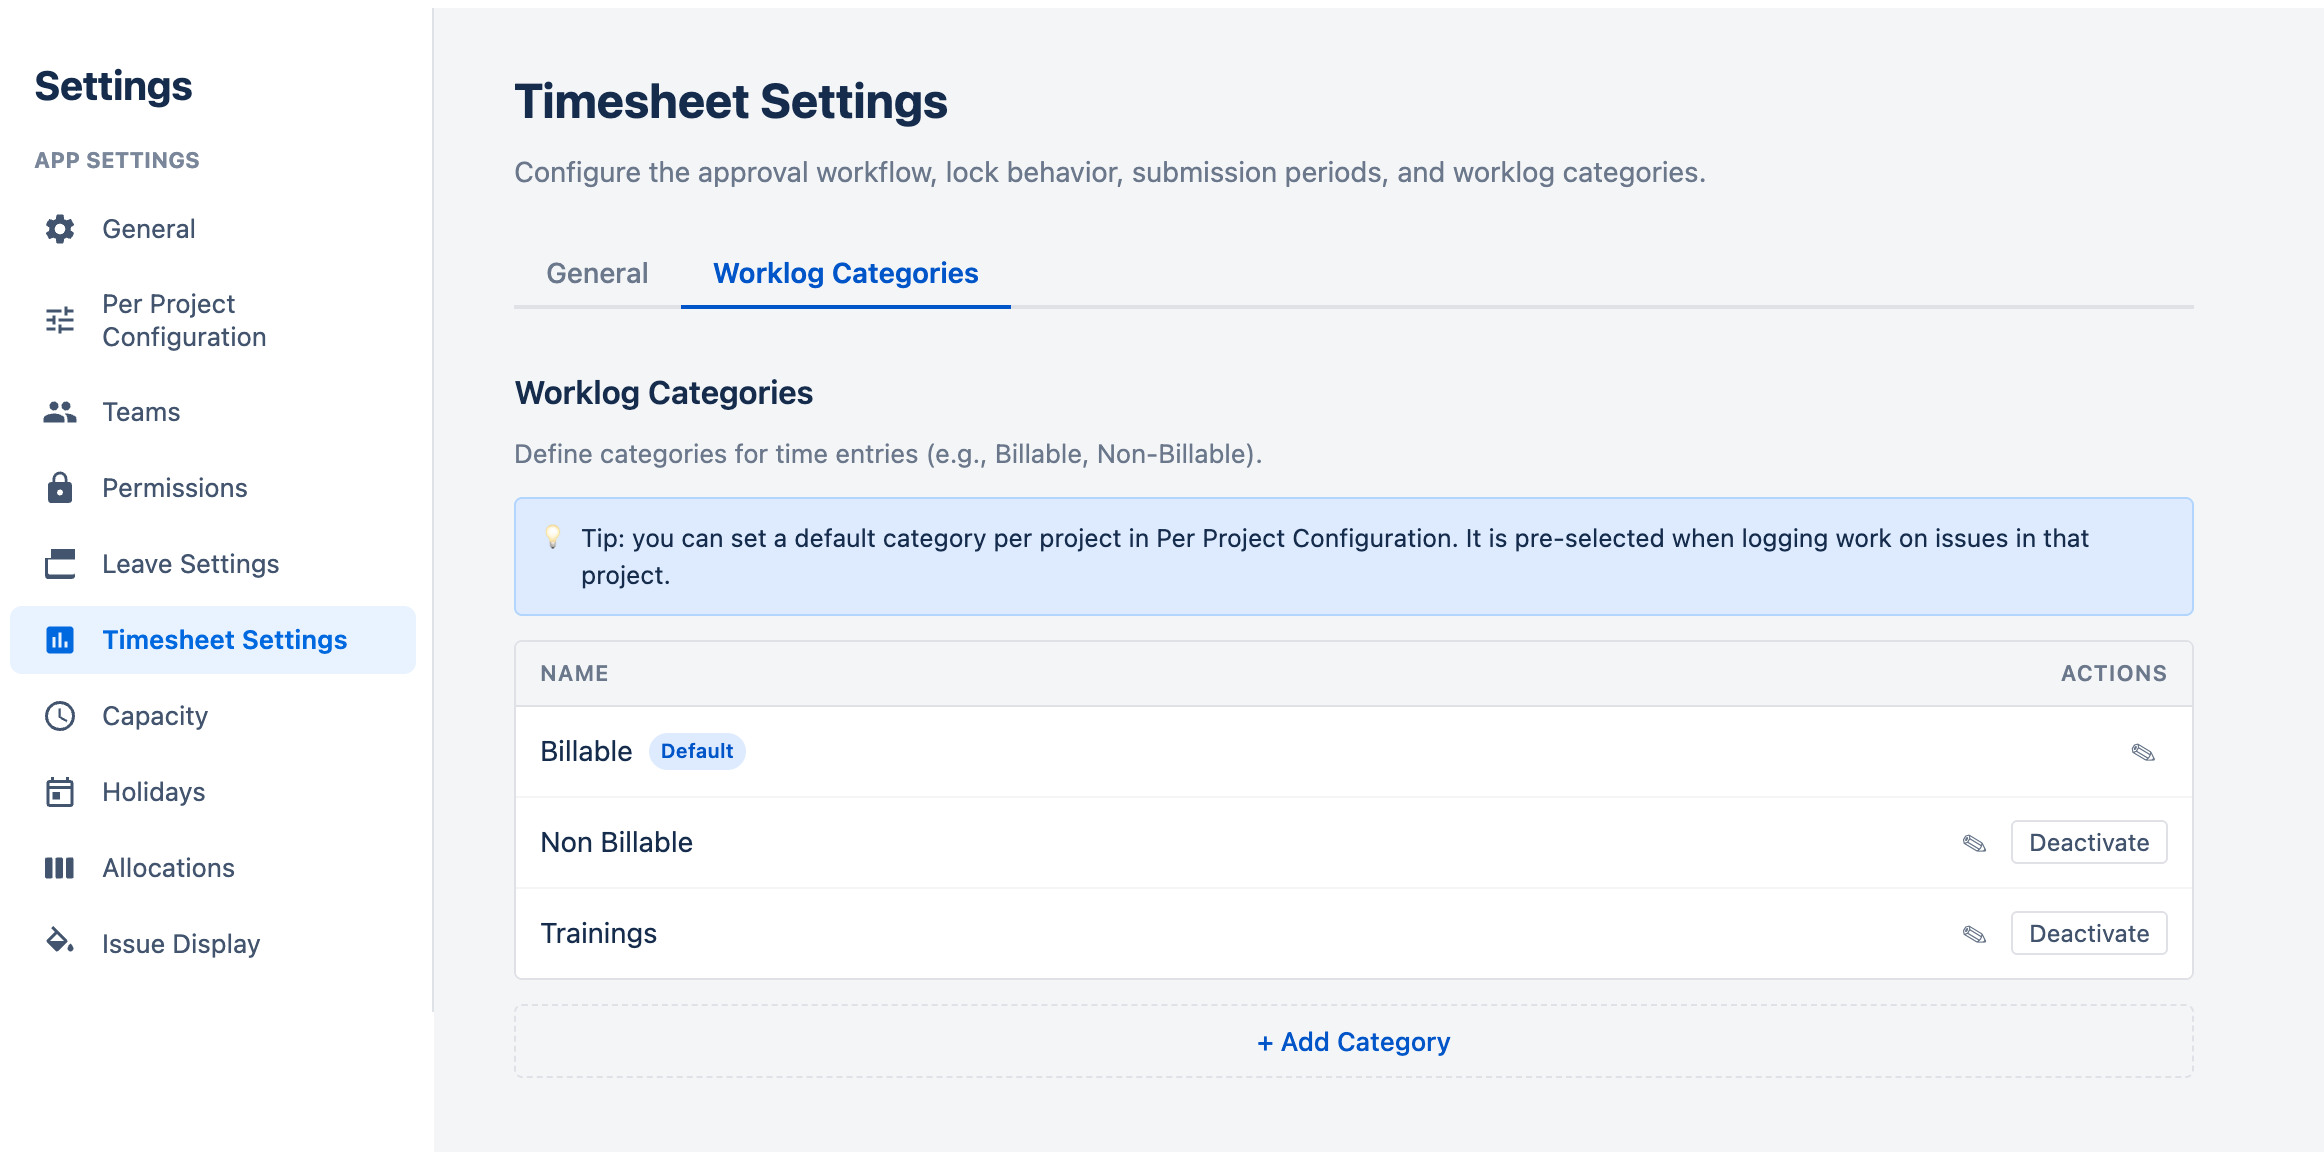
You can set a default category per project under Settings → Per Project Configuration. That category is pre-selected when logging work against an issue in the project; projects without an override inherit the organization default. Deactivating a category clears any per-project default that pointed at it.
Permissions Back to top
The Permissions tab controls who can access WorkHub and at what level. It is organized into six sub-tabs:
Issue Display Back to top
The Issue Display tab has three sub-tabs: Issue Color (how issue bars are painted), Issue Card (which fields show directly on the issue bar and sidebar card), and Issue Tooltip (which fields appear in the popover when you click an issue bar).
Issue Color
- Default appearance — color by Jira status category (the original behavior) or a single uniform color for every unmatched issue.
- Color rules — "when field X matches value Y, paint the bar Z." Drag the handle on each rule to set priority — the first matching rule wins.
- Supported field families — priority, status, issue type, fix versions, components, labels, custom select / multi-select / text / number / date fields, and presence checks (
is empty) for user-picker fields and most other custom field kinds.
For full details, examples, the operator reference, and supported field types, see the dedicated Issue Colors page.
Issue Card
Choose which fields appear directly on the issue bar in the Scheduler and on the issue card in the plan-issue sidebar — the information you see at a glance, without clicking. (The Issue Tooltip below is different: it controls the popover that opens when you click a bar.)
- Each card has two lines, and you can place up to two fields on each. Fields on the same line appear side by side, separated by a “·”.
- Out of the box, the first line shows the issue key and the second line shows the summary. You can change either line — for example add the assignee, due date, or a custom field.
- Pick fields the same way as the tooltip: search on the right, then click +1 to add a field to the first line or +2 for the second line. Use × to remove and ↑/↓ to reorder on the left.
- Three checkboxes turn the issue-type icon, priority icon, and hours badge on or off. These always sit at the start of the first line.
- The Preview shows how a card will look as you make changes. If a field has no value on an issue, it is simply left off that card, so cards stay clean.
- Reset to defaults returns to the issue key on line 1 and the summary on line 2.
Site-wide, admin-only — the chosen layout applies to every user on the site.
Issue Tooltip
Choose which Jira fields appear in the issue-click popover on the Scheduler. The left column lists the fields you've selected, in display order. The right column lists all available Jira fields, grouped into System fields (Status, Assignee, Priority, Due date, etc.) and Custom fields (anything starting with customfield_ — Story Points, Sprint, Epic Link, organisation-specific selects, etc.). Type in the search box to filter by name or field ID.
- Click + on the right to add a field; × on the left to remove it; ↑/↓ to reorder.
- Reset to defaults repopulates the list with Status, Assignee, Priority, Due date, Time estimate, and Project — the default popover content out of the box.
- Saving an empty list is valid — the popover then shows a placeholder message with a link back to this tab.
- Field values are loaded on demand when a user clicks an issue, so adding heavy custom fields does not slow down the schedule fetch. Values are session-cached, so reopening the same issue is instant.
- The fetch respects Jira's per-field permissions — users only see field values they are allowed to view in Jira.
Site-wide, admin-only — the chosen list applies to every user on the site.
Need Help?
If you have questions or need assistance, our support team is here to help.
Contact Support