Overview Back to top
Resource Allocation Planning for Jira is a top-down resource booking system for Jira Cloud. It enables project managers and team leads to allocate team members across Jira projects, epics, issues, or custom-defined categories with a specific number of hours per day over defined time periods.
The plugin requires zero configuration and can be used within minutes of installation. Simply create a team, add your members, and start booking resources.
Key Features
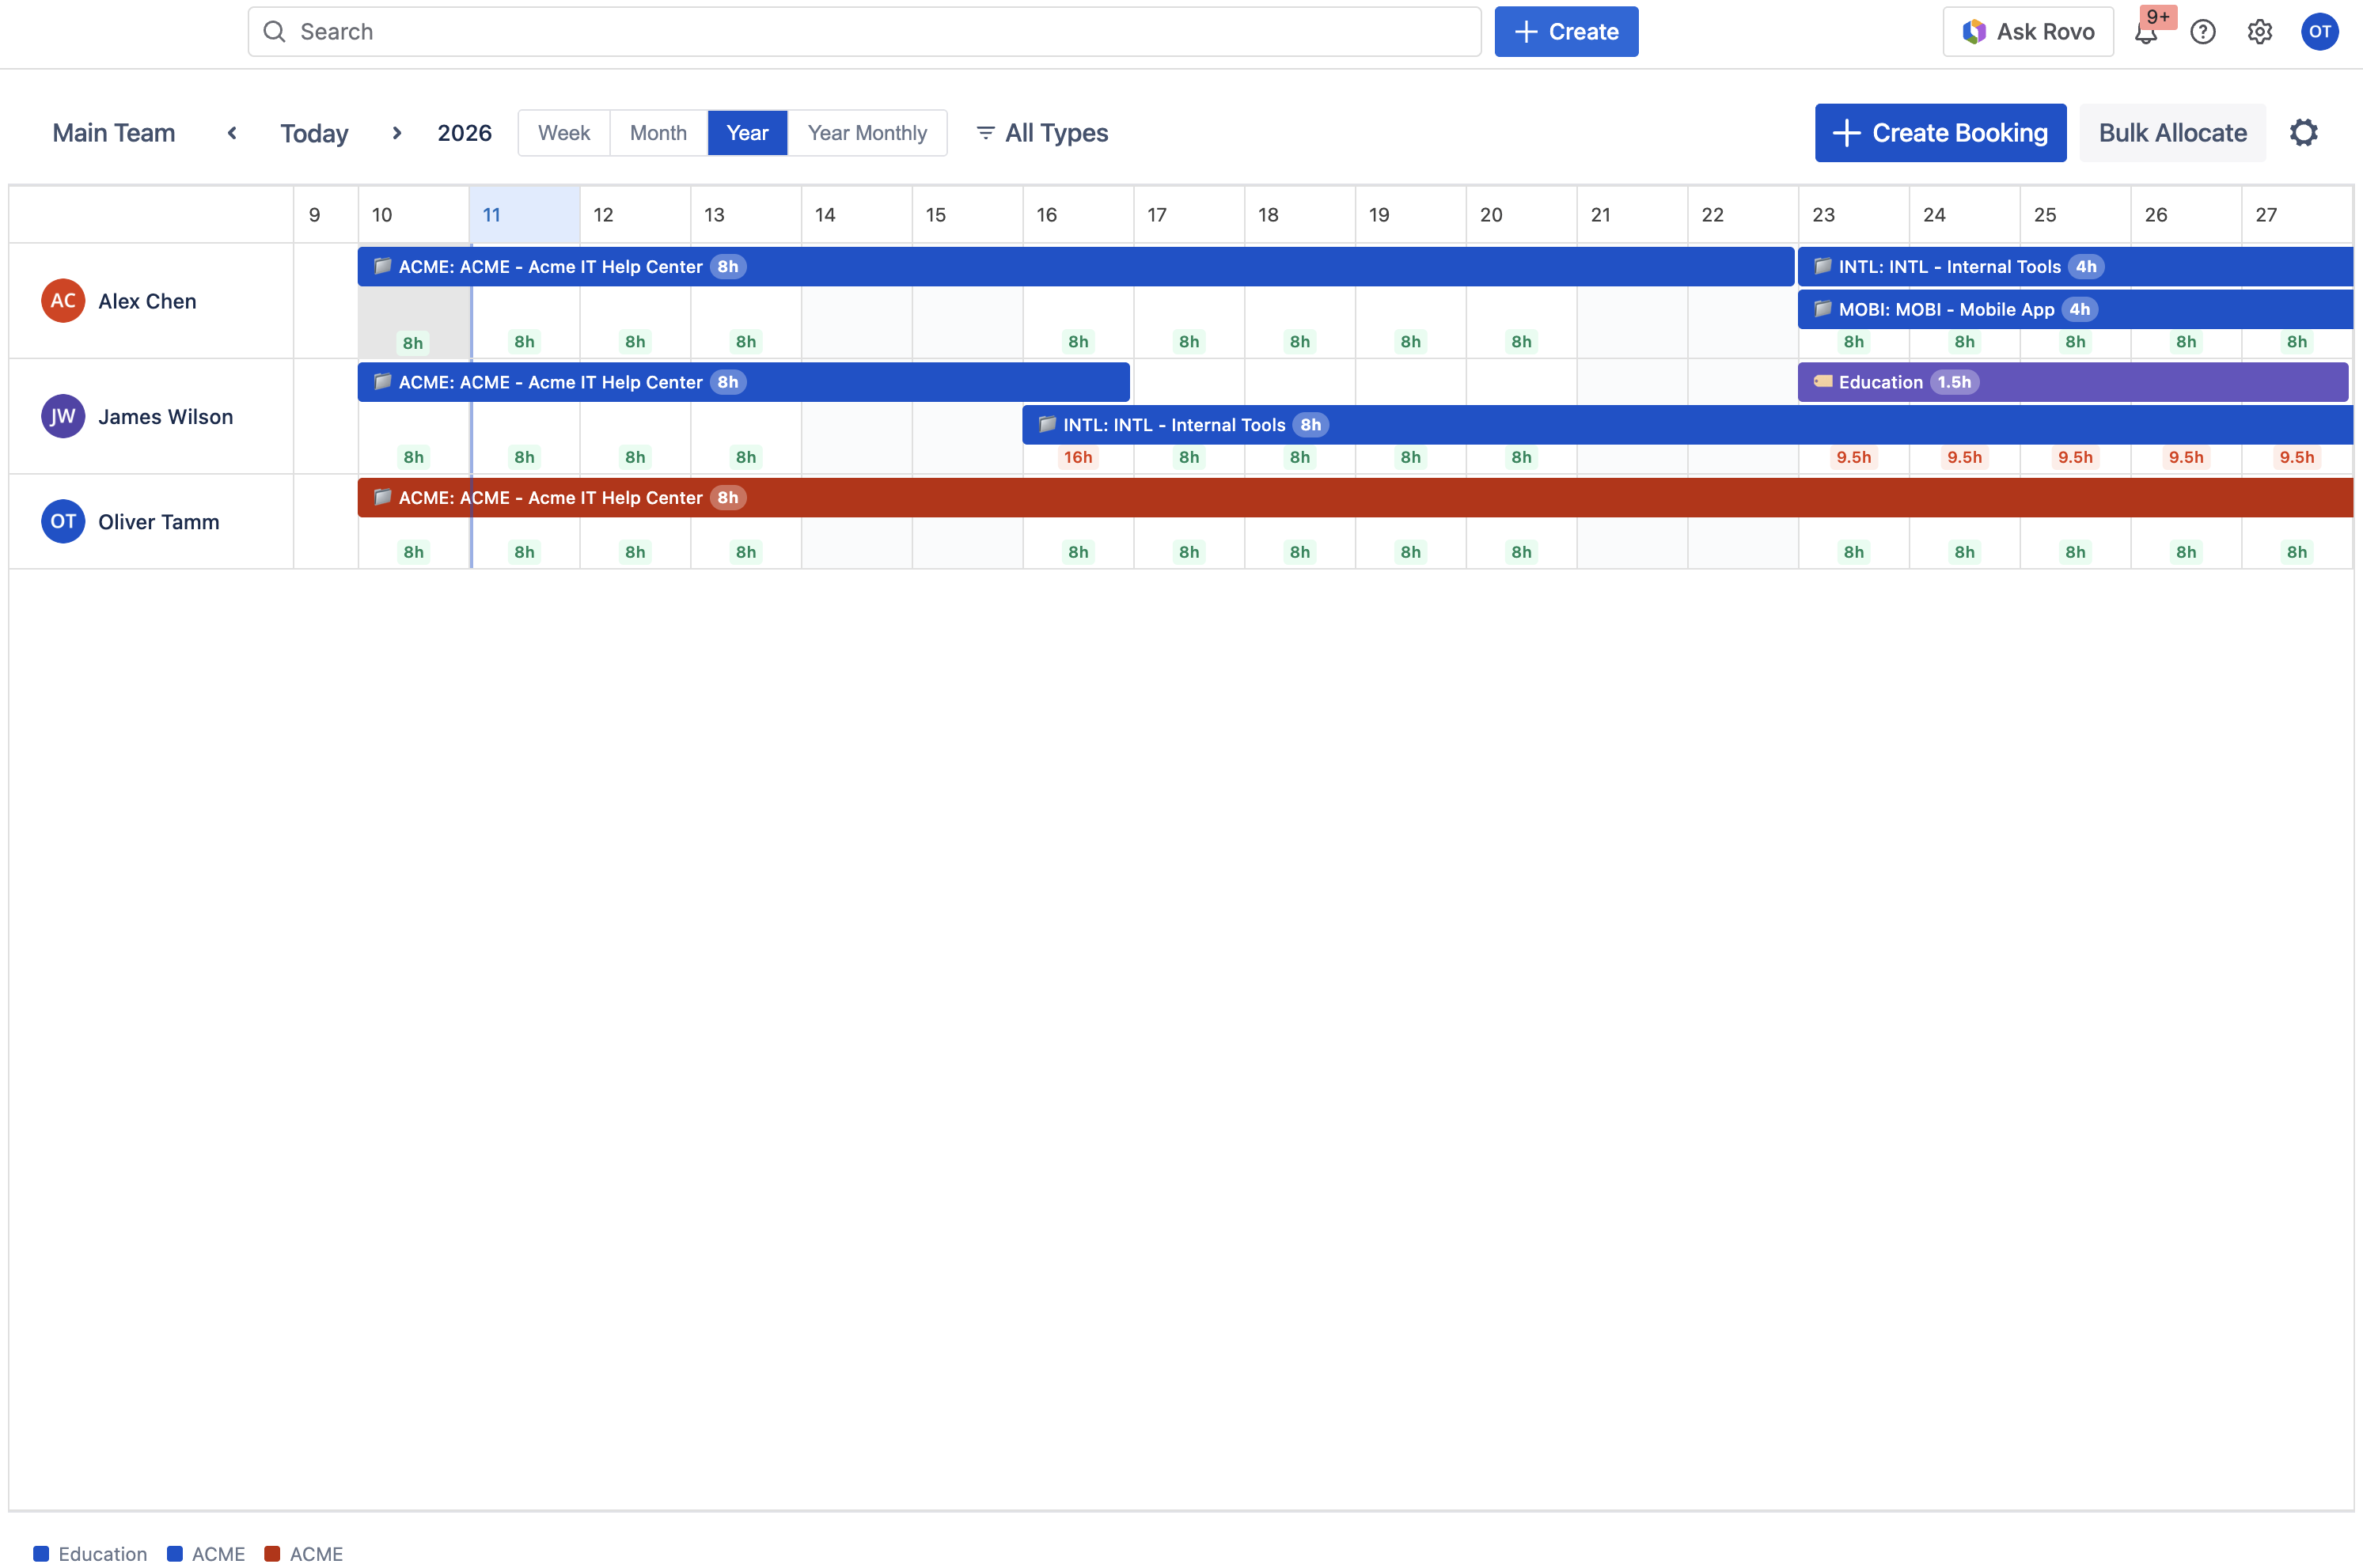
- Team-based timelines: Create named teams with selected Jira users displayed as rows
- Flexible work targets: Book against Jira Projects, Epics, Issues, or Custom Categories
- Multiple view scopes: Week, Month, Year, and Year Monthly views
- Drag-and-drop: Move and resize bookings directly on the timeline
- Bulk allocation: Assign multiple users to the same work target at once
- Color-coded bars: Stacked booking bars with hours-per-day indicators
- Color legend: Visual mapping of work target colors at the bottom of the timeline
Key Concepts Back to top
Teams Are Views
A team (allocation timeline) is a saved filter — a named set of users to display together. The same user can appear in multiple teams, and their bookings are identical across all of them. Teams define who you see, not what bookings exist.
Bookings Are Global
A booking belongs to a user and a work target. It is not scoped to any particular team. When a booking is created for a user, it appears on every team that includes that user.
Flexible Work Targets
A booking can be linked to one of four work target types:
- Jira Project — allocate time to an entire project
- Epic — allocate time to a specific epic within a project
- Issue — allocate time to a specific Jira issue
- Custom Category — user-defined label with color (e.g., "Education", "Internal Meetings")
First Steps Back to top
After installing the app from the Atlassian Marketplace, access it via the Apps menu in Jira. Follow these steps to get up and running:
- Open Resource Allocation from the Jira Apps menu.
- Create your first team — give it a name and select the Jira users you want to display. Learn more about Team Management →
- Create a booking — click the "+ Create Booking" button, select a user, choose a work target type (Project, Epic, Issue, or Custom Category), set hours per day and a date range. Learn more about Bookings →
- Explore the timeline — use the toolbar to navigate dates, switch between Week, Month, Year, and Year Monthly views, and filter by work target type. Learn more about Timeline Views →
Need Help?
If you have questions or need assistance with Resource Allocation Planning for Jira, our support team is here to help.
Contact Support